Creating and Executing the Online Notebook
In this topic, you can see the step-by-step process for creating and executing the Notebook along with its features.
In this Topic:
How to Create and Execute the Notebook
To create a notebook, you must log in to LeapLogic after creating an account (see Prerequisites for more details) and follow the below steps:
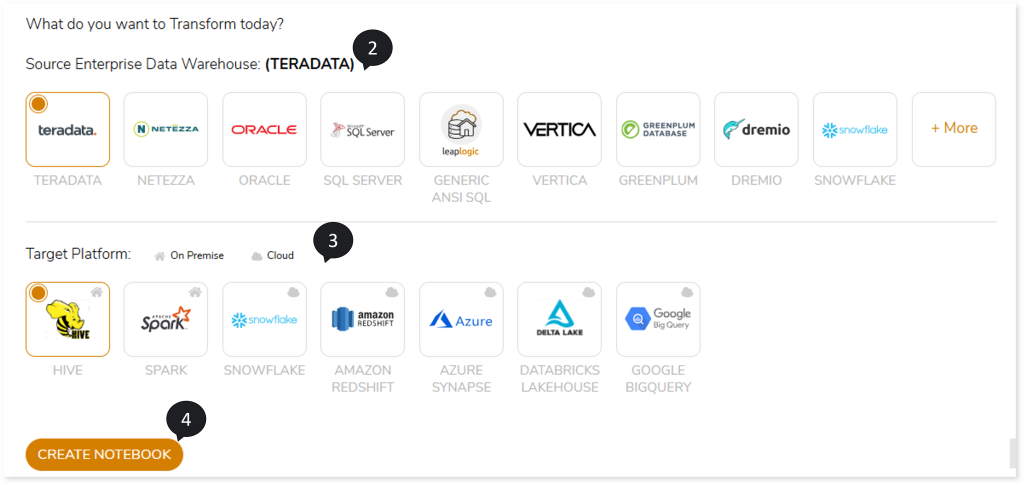
- Select SQL Transformation > Transform or SQL Transformation > Notebook > CREATE NOTEBOOK on the left navigation pane to create an online notebook.

- In Source Enterprise Data Warehouse, select the data warehouse or database that you want to transform, such as Teradata, Netezza, Oracle, SQL Server, Vertica, Greenplum, or T-SQL.
- In Target Platform, select the target such as Hive, Spark, Snowflake, Amazon Redshift, Azure Synapse, Databricks, Databricks Lakehouse, Google Big Query, etc.
The below table shows the Target Platform corresponding to the Source Enterprise Data Warehouse.
|
Source Enterprise Data Warehouse |
Target Platform |
|
Teradata |
- Hive
- Spark
- Snowflake
- Amazon Redshift
- Azure Synapse
- Databricks Lakehouse
- Google Big Query
|
|
Netezza |
- Hive
- Spark
- Snowflake
- Amazon Redshift
- Azure Synapse
- Databricks Lakehouse
- Databricks Notebook
|
|
Oracle |
- Hive
- Spark
- Snowflake
- Amazon Redshift
- Azure Synapse
- Databricks Lakehouse
- GCP PostgreSQL
- Aurora PostgreSQL
|
|
SQL Server |
- Aurora PostgreSQL
- Hive
- Spark
- Databricks Lakehouse
- Amazon Redshift
|
|
GENERIC ANSI SQL |
- Spark
- Snowflake
- Amazon Redshift
- Databricks Lakehouse
|
|
Vertica |
|
|
Greenplum |
|
Dremio |
Amazon Athena |
|
Snowflake |
- Databricks Lakehouse
- Databricks Notebook
|
|
Db2 |
Amazon Redshift |
- Click CREATE NOTEBOOK.

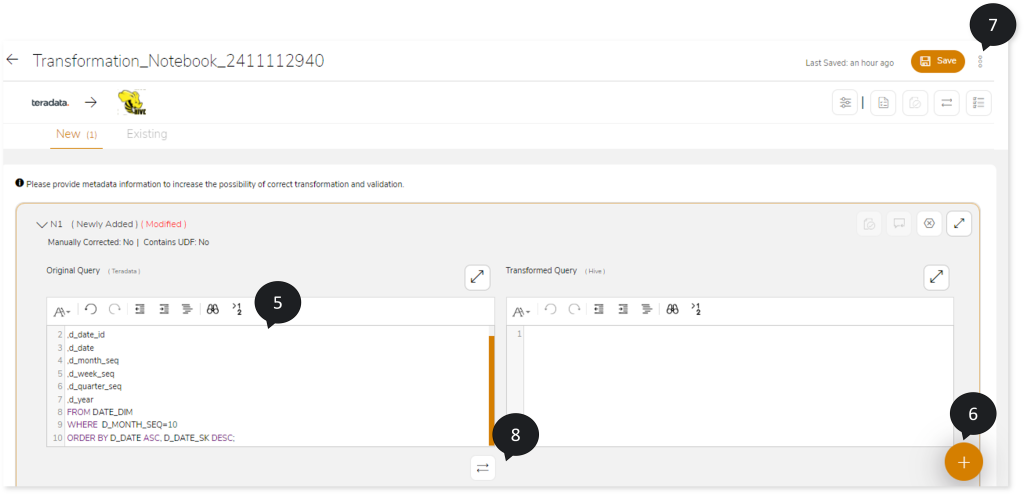
- In Original Query box, enter the query that you want to transform.

Alternatively, you can import the query for transformation. To do so,
- Click
 (top right corner) on the Transformation Notebook page and then select Import.

- Select
 to upload the scripts. You can upload the scripts or queries as .sql or .txt files. Each query is automatically segregated and placed into different query blocks in the notebook.
 - Click
 to save the uploaded files.

- Only one query is allowed in one query block. Click
 (Add New Transformation) to add more queries.
 - Click
 (top right corner) on the Transformation Notebook page and then select Configure.
- Configure Transformation to associate live or offline metadata with your notebook to increase the accuracy of the transformation.
- Configure Unit Level Validation to perform unit/ query level validation.
- Configure Script Level Validation to perform data-driven validation.
- Click
 to transform the original query from the source to the target platform.
 - Click
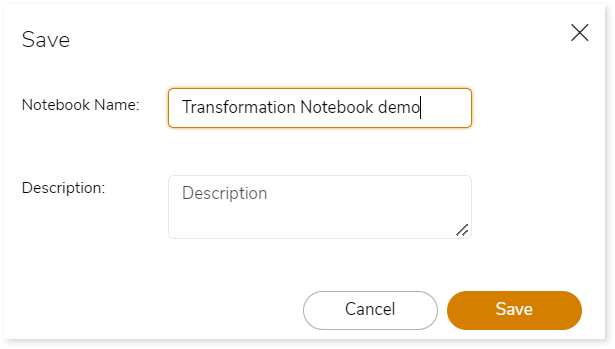
 . Save dialog opens.
 - In Notebook Name and Description, enter the name and description of the notebook.

- Click
 to create the Notebook.
As soon as the Notebook is added successfully, the system displays a snackbar pop-up window to notify the success message.

Furthermore, you can access and update your notebook from the Notebook Listing page.
Supported Features of the Notebook
The online notebook editor has several features that allow quick access and accelerate the transformation experience.
|
Feature |
Icon |
Actions |
|
Transformation |
 |
Transform the original query from the source to target individually. |
|
Validate button |
 |
To validate the query. You can validate based on:
- Unit Level
- Script Level
- Syntax
|
|
Transformation Difference |
 |
Shows the differences between the source and the transformed query. |
|
Discard |
 |
To remove the changes made to the Transformed Query box. |
|
Expand |
 |
To expand the online notebook editor. |
|
Collapse |
 |
To collapse the expanded view of the online notebook editor. |
Validate All
Transform All
|
 |
You can find these options at the top right corner of the Transformation Notebook page.
- To validate all queries in one go.
- To transform all queries in one go.
|
|
Compare |
 |
To compare and show the differences between the source and the transformed query in one go. |
|
Filter |
 |
To Filter the queries. The queries can be filtered based on:
- All
- Auto transformed
- Modified
- Newly Added
- Manual Correction Required
|
|
Select All |
 |
To select all the queries. |