Configuring Query Validation
This stage validates the transformed queries using the query validation engine to ensure successful query transformation. The output generated by the source and target (transformed) queries are compared to determining the accuracy of the transformed queries.
In query validation, there are two scenarios depending on the availability of test data.
- When test data is available: In this case, you have access to real enterprise dataset (clients have shared the test dataset or allow access to their database containing source tables) to validate the source and target queries. The source and target (transformed) queries are executed to generate outputs, then those outputs are compared to ensure the accuracy of the transformed queries.
- When test data is not available: In this case, real enterprise data is not available for testing. So, the validation engine auto-generates test data based on complex query conditions to validate the transformed queries. The system inserts values into the source and target tables based on the auto-generated test data. Then, both the source and target (transformed) queries are executed to generate outputs, and those outputs are compared to ensure the accuracy of the transformed queries.
Validation process
Query validation consists of the following steps when test data is not available:
- Generate synthetic test data using various scenarios and edge cases using the validation engine (LeapLogic Engine or Embark).
- Create and populate tables on the databases. This includes the incorporation of values into the source and target tables based on the generated synthetic test data.
- Execute source and target (transformed) queries.
- Validate the results with the output data generated after execution.
To configure the Query Validation, follow the below steps:
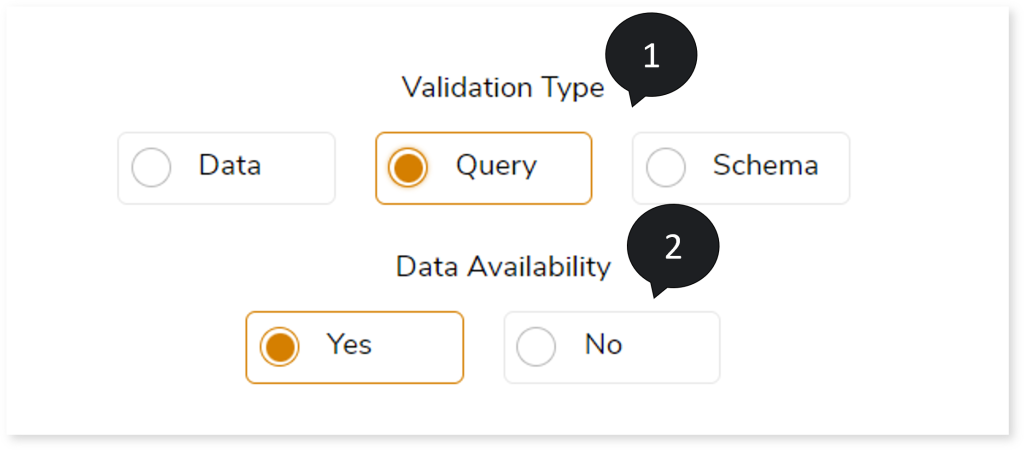
- In Validation type, select Query to validate the transformed queries.
- Choose Data Availability as:
Configuring Query Validation (When Data is Available)
To configure the query validation:
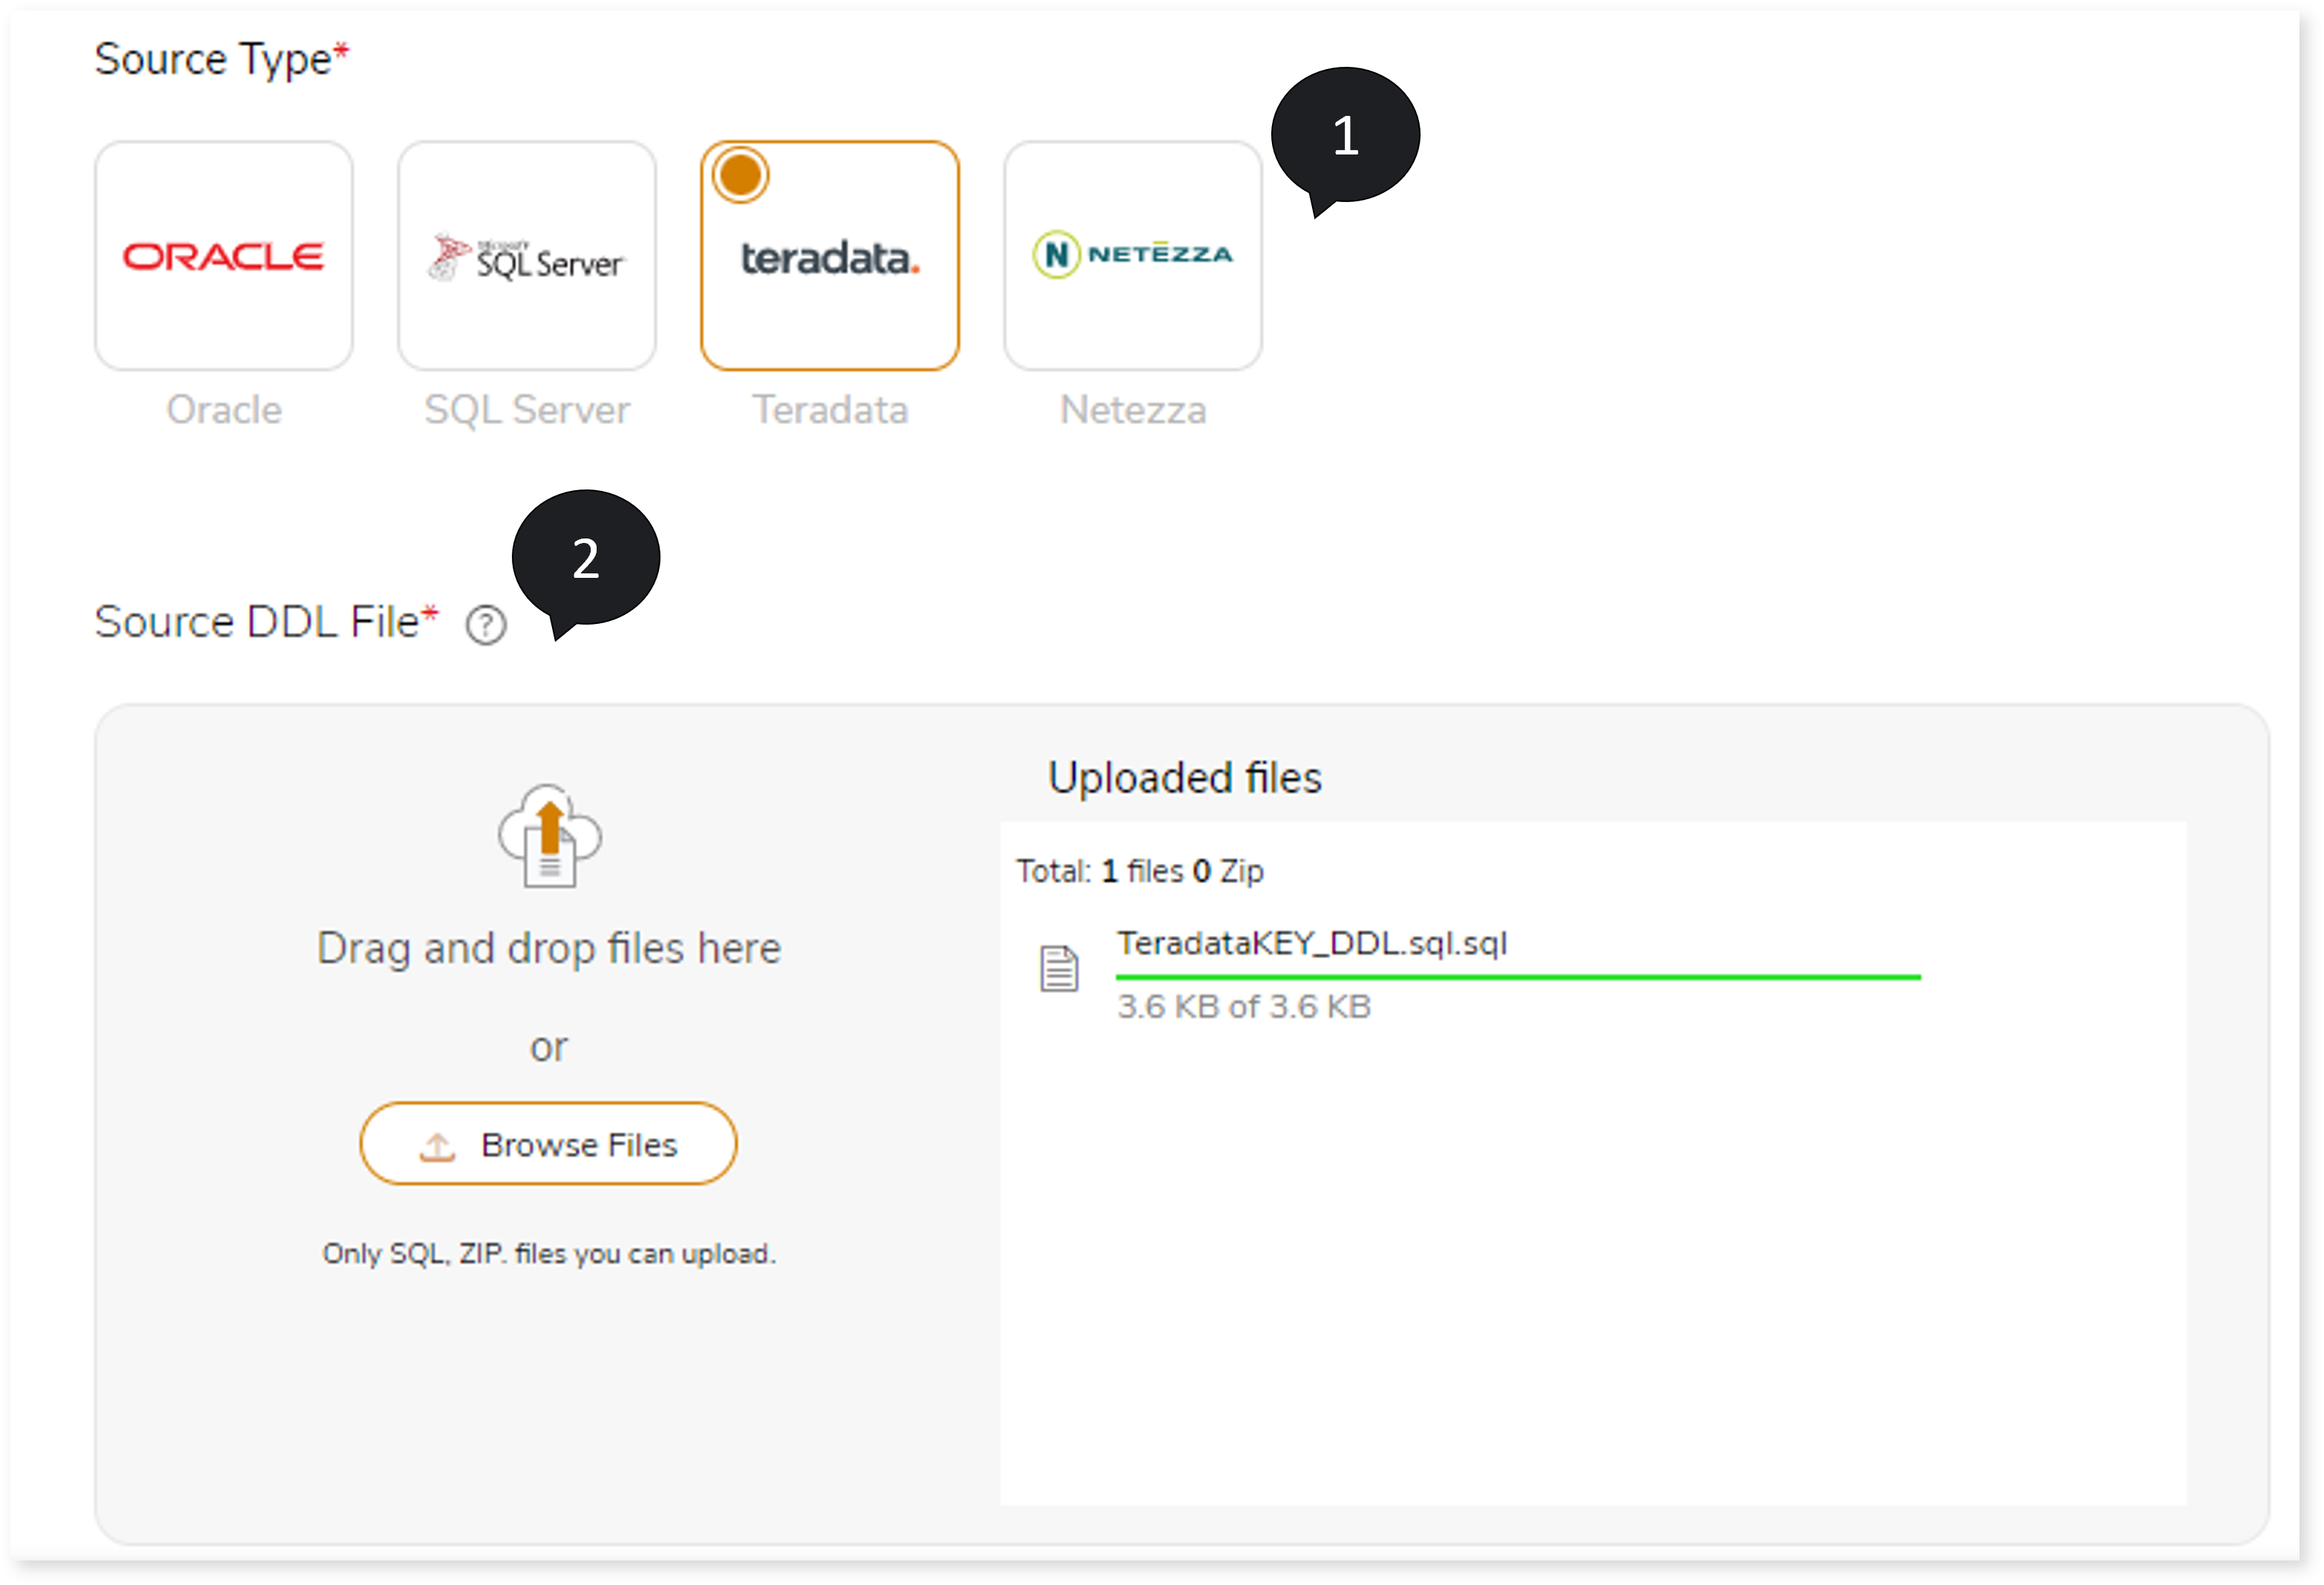
- In Source Type, select the source type such as Oracle, SQL Server, Teradata, or Netezza.
- In Source DDL File, upload the ddl file to define the source schema.
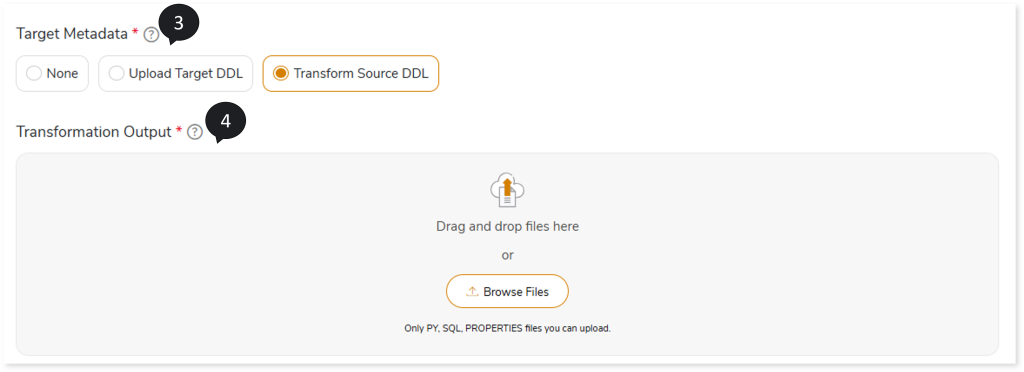
- Choose the Target Metadata as:
- None: Does not execute the source DDL. If any target table is missing, it will be created during the execution of its respective query.
- Upload Target DDL: To execute the target DDL scripts and create the target schema. In Target DDL File, you can upload the target DDL files to define the target schema.
- Transform Source DDL: Transforms the source DDL to the target equivalent format and executes it on the target.
- In Transformation Output, upload the Transformation stage output file to map the original and transformed queries. An integrated pipeline does not require the Transformation Output files to be uploaded. As part of the pipeline execution, the system automatically fetches the data from the Transformation stage.
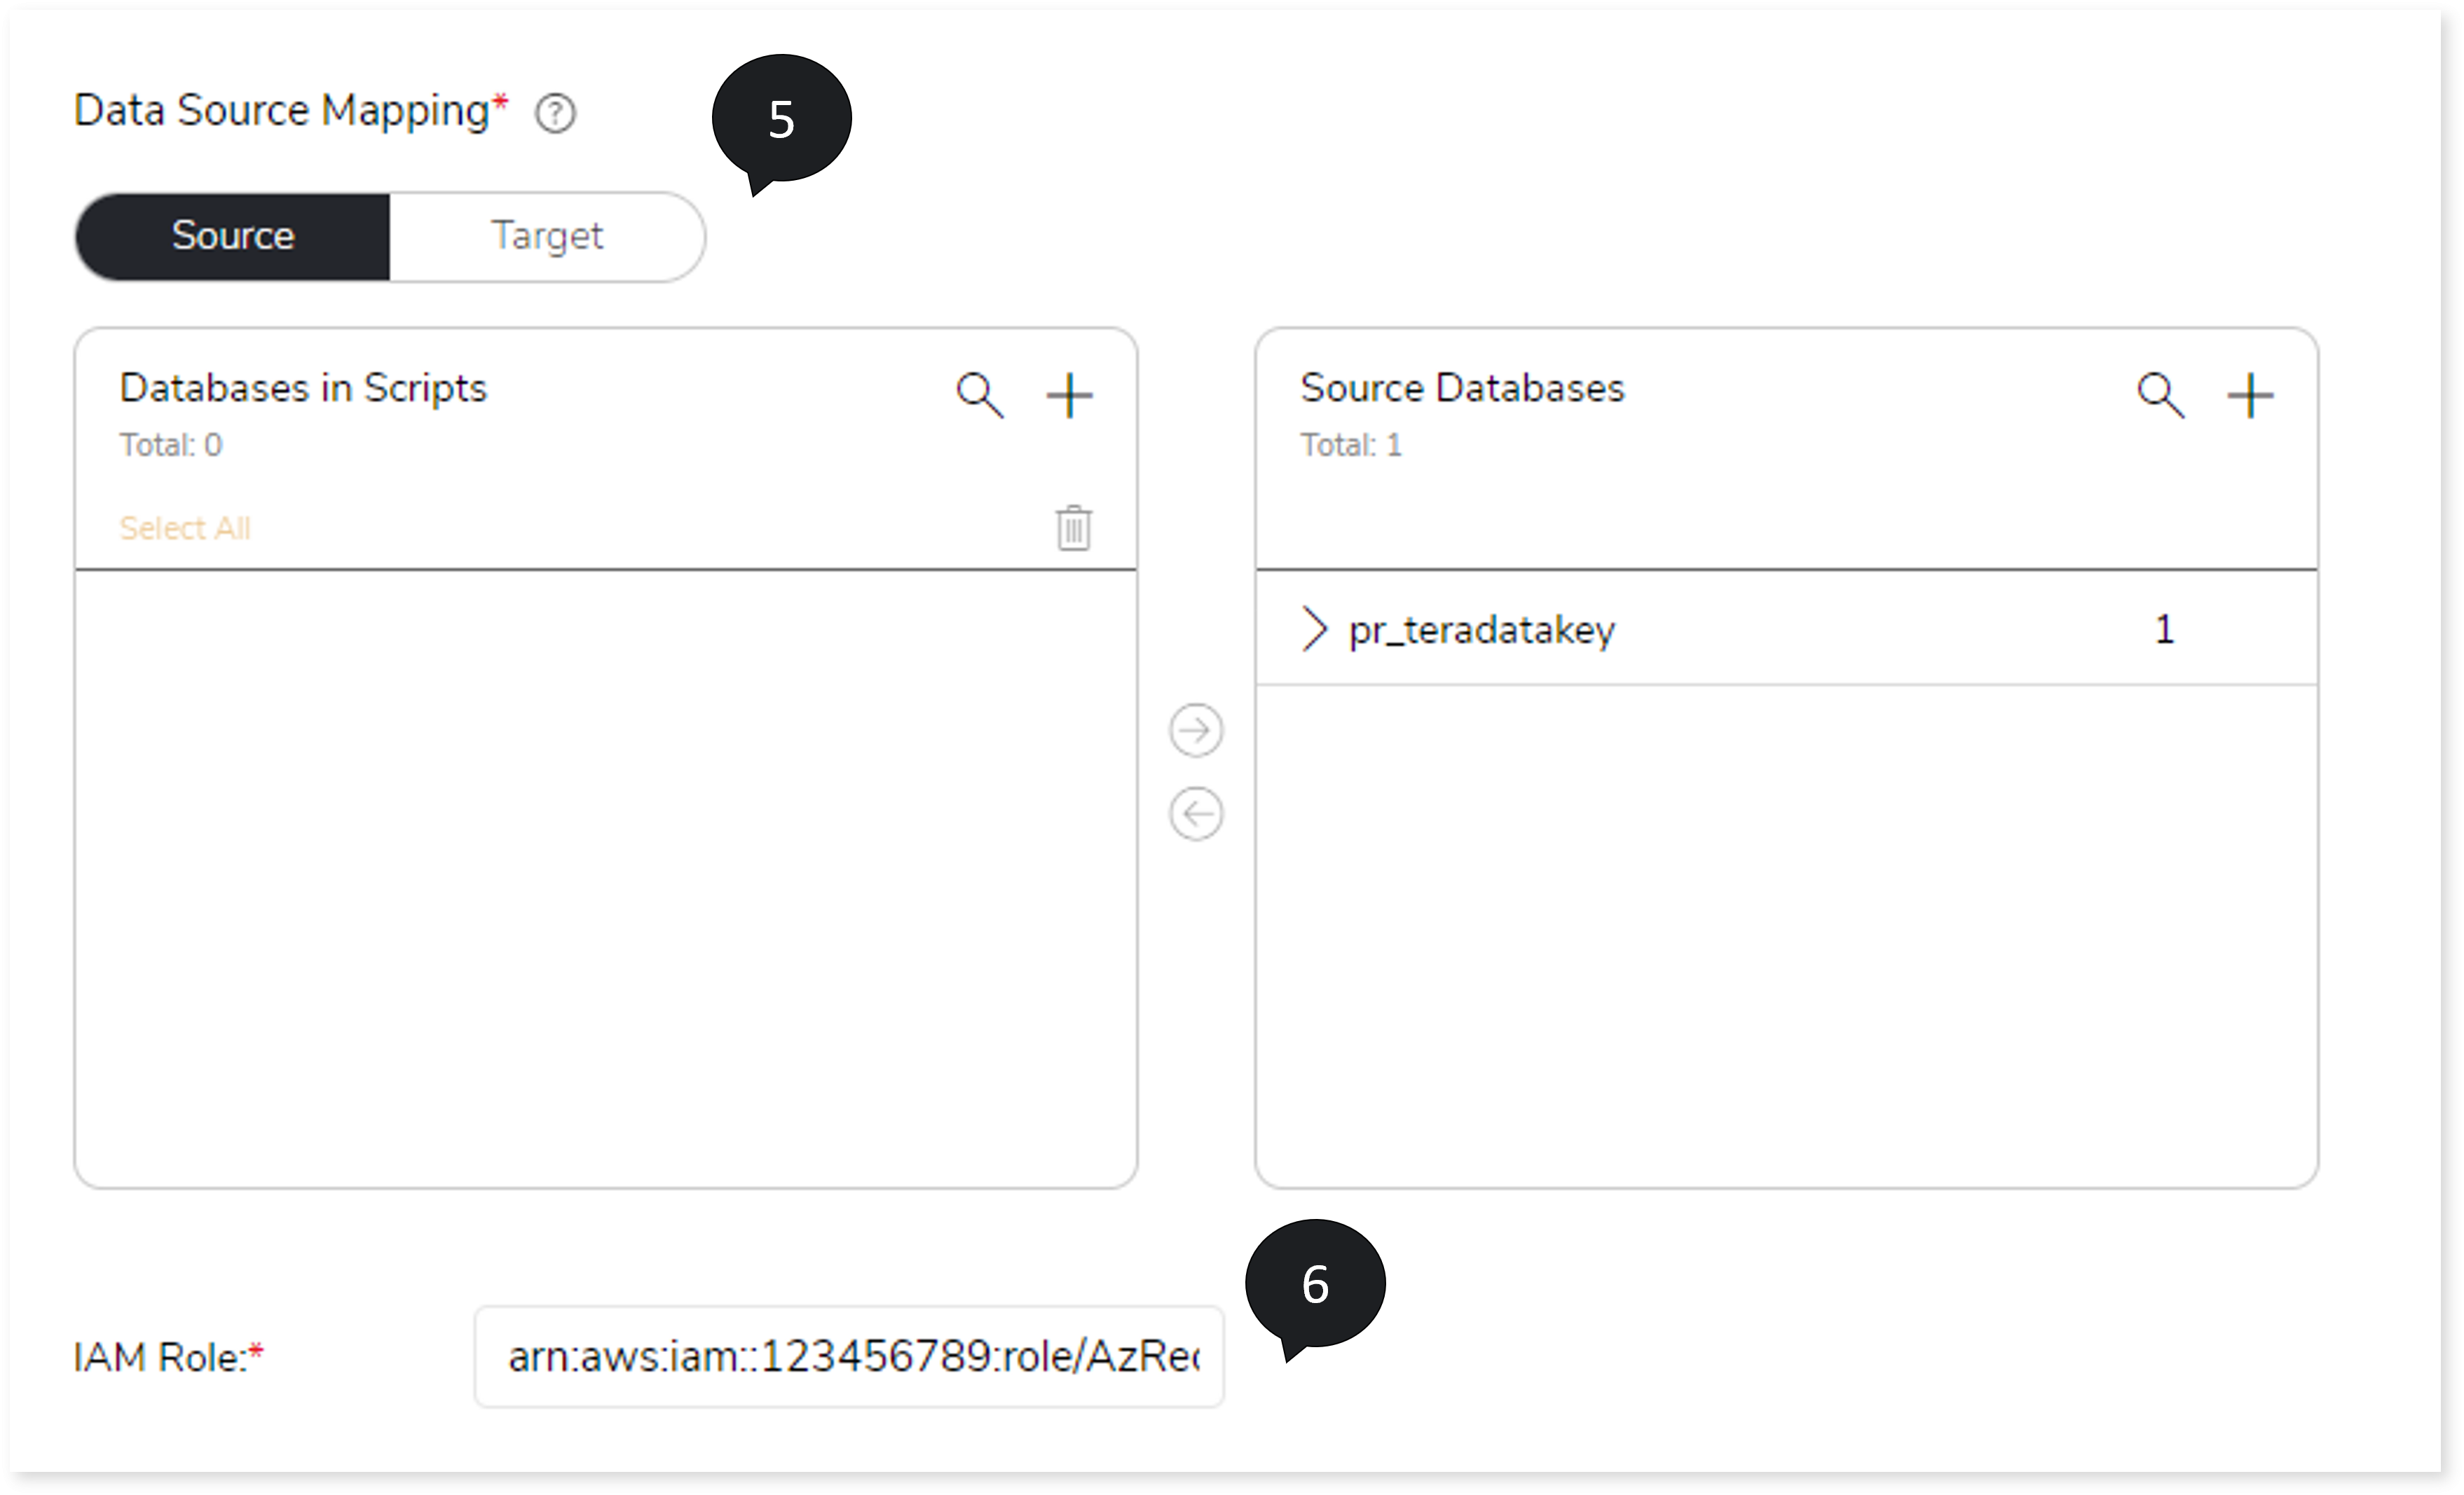
- In Data Source Mapping, map the database in the script with the source and target databases. To do so,
- In the Source/Target tab, two cards are available:
- Databases in Scripts
- Source Databases/Target Databases
The Databases in Scripts card contains all the databases available in the selected script. The database(s) displayed in the Databases in Scripts card must be mapped to the Source Database/ Target Database card.
- Click + on the Source Databases/Target Databases card and add the dummy database. To add the database, follow the steps below:
- Click + on the Source Databases/Target Databases card.
- Choose repository.
- Select data source.
- Click
 to save the source/ target data source.
- To map the database(s) in the Databases in Scripts card to the Source Databases/ Target Databases card, follow any of the steps below.
- Drag and drop the database in the Databases in Scripts card to the database in the Source Databases/Target Databases card.
- Click the checkbox of the preferred database available in the Databases in Scripts card and then click the preferred database in the Source Databases/ Target Databases card.
- Enter the IAM Role.
- In Storage Data Source, upload the storage data source.
- Click Source Configuration.
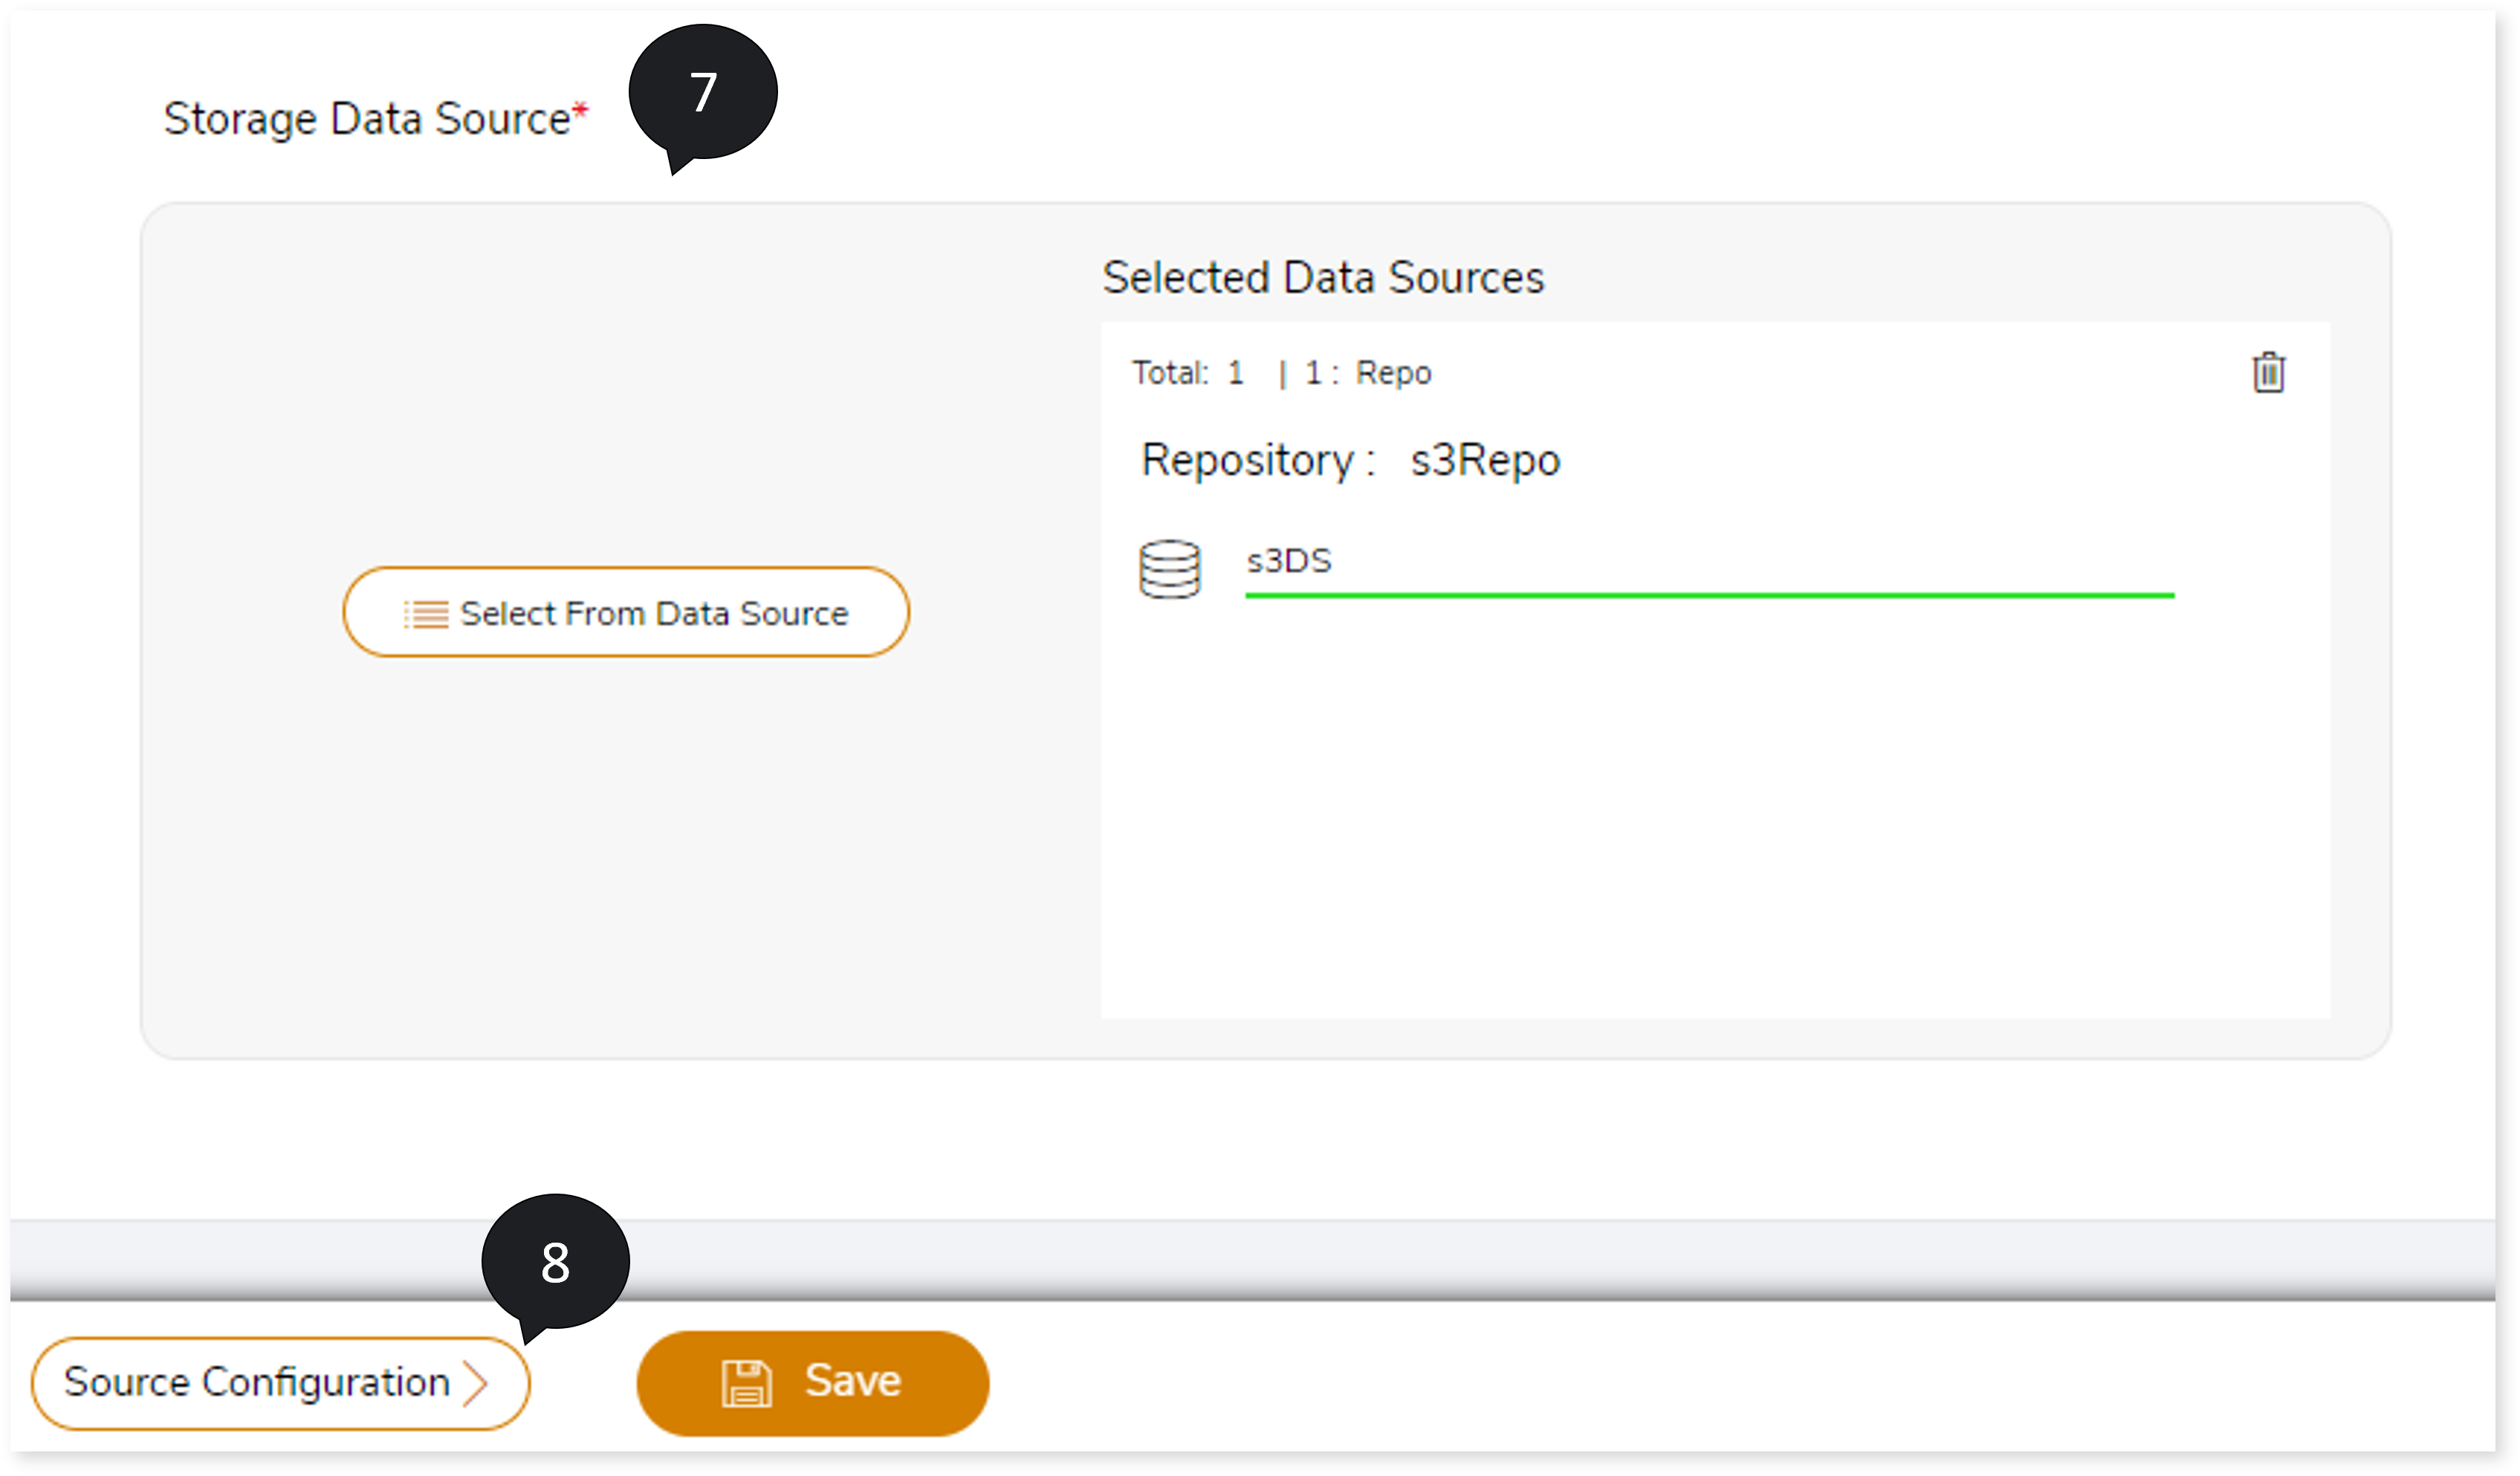
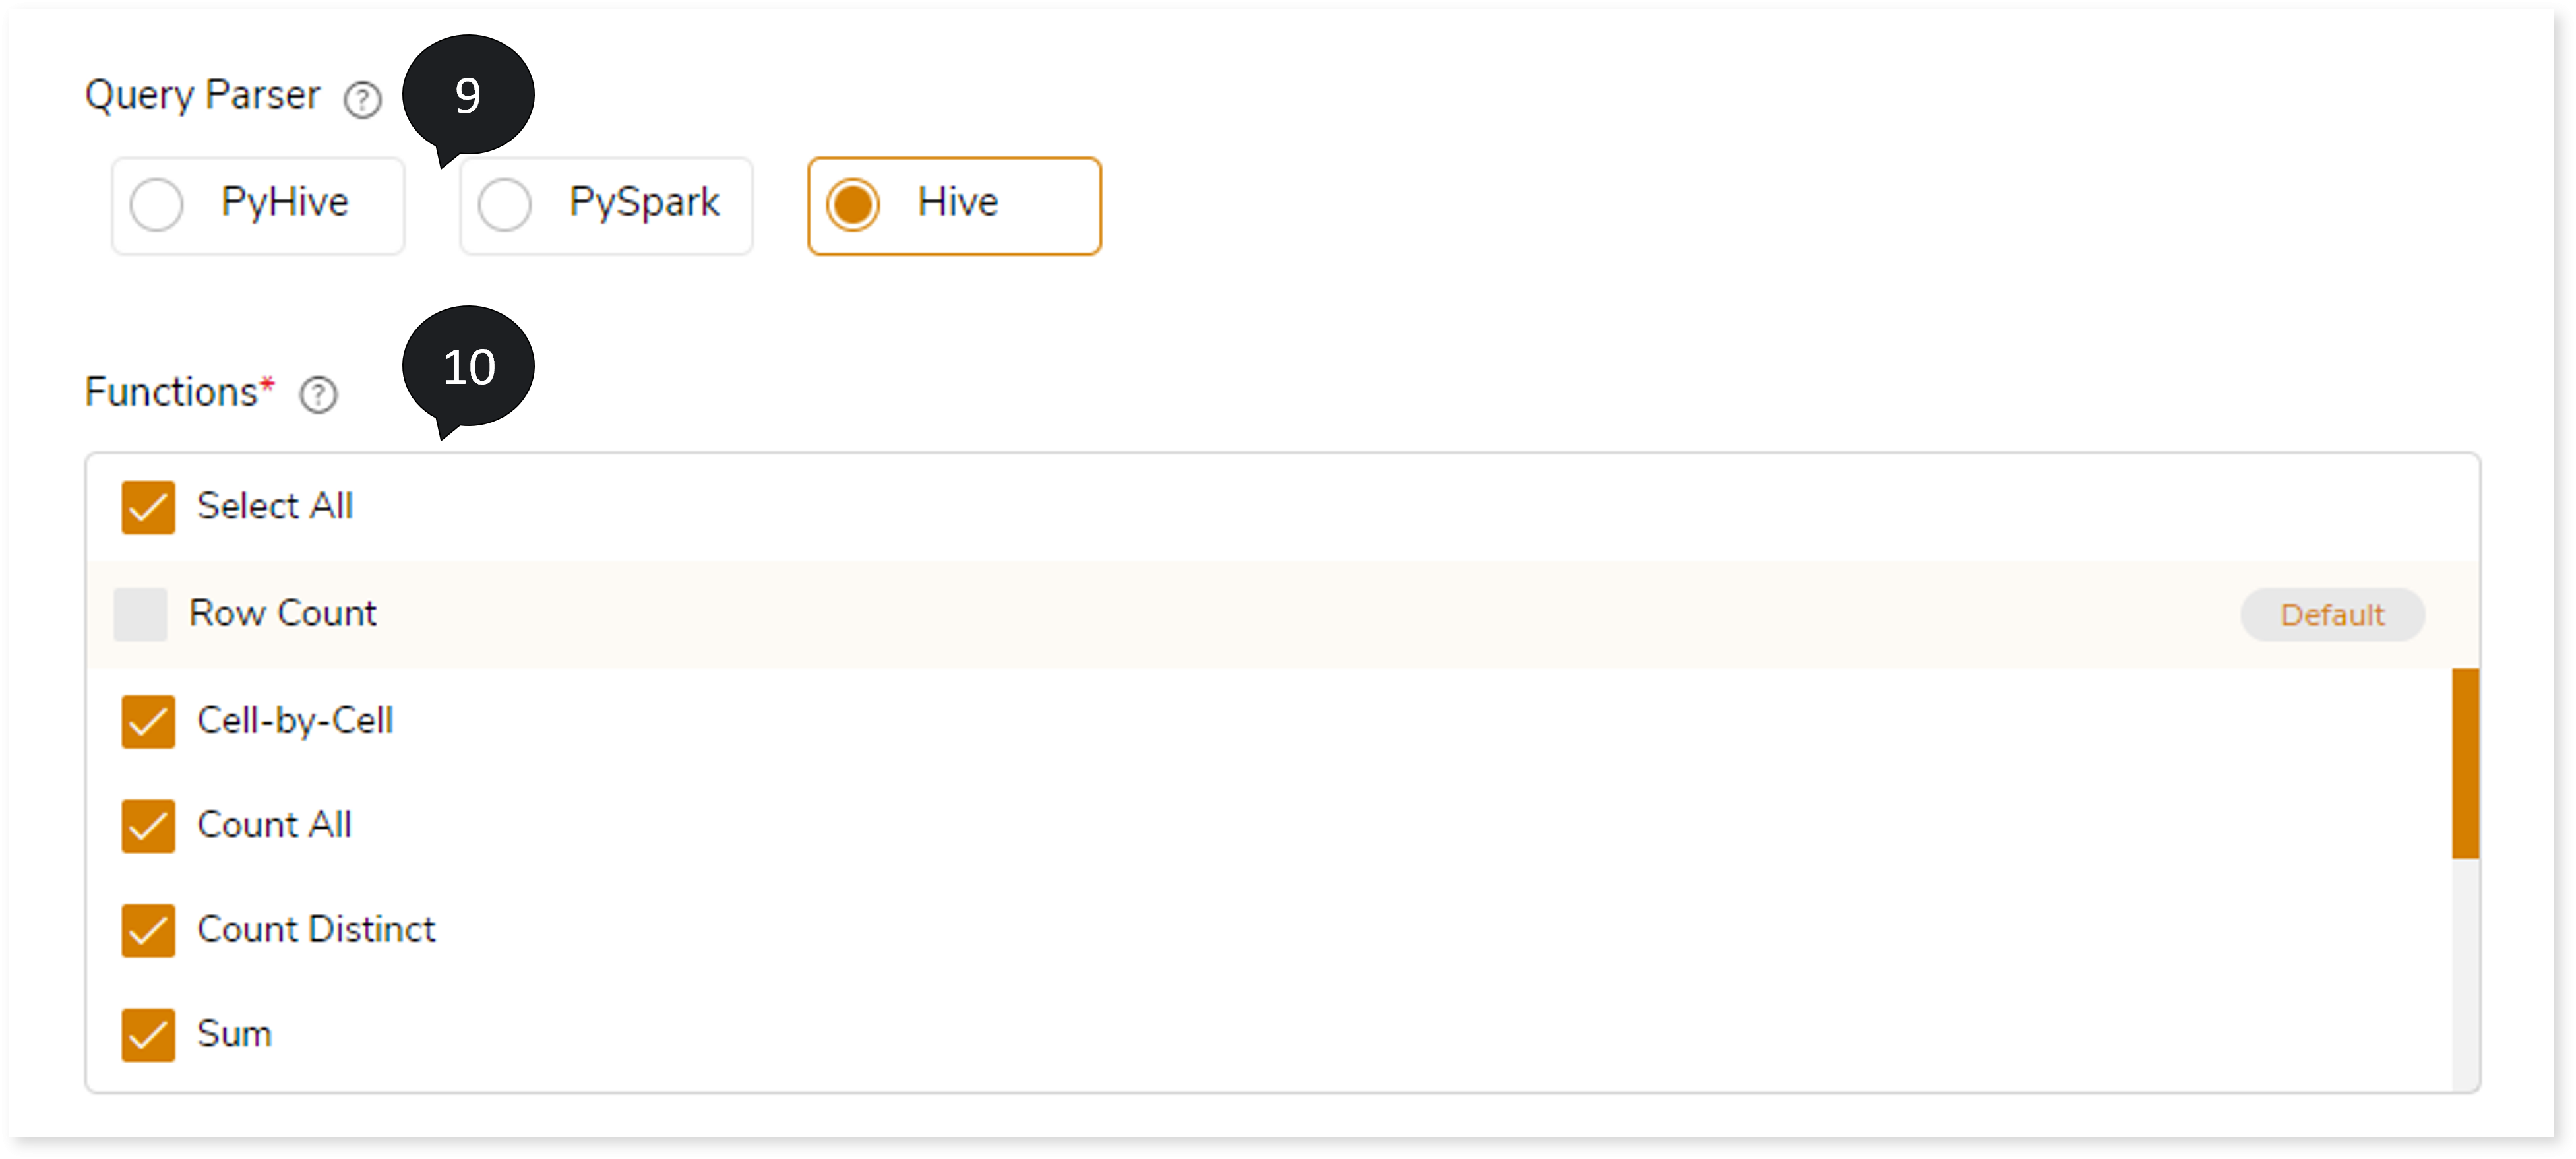
- In Query Parser, select the parser such as PyHive, PySpark, or Hive based on the uploaded transformation output. If you uploaded:
- .sql files in Transformation Output, then you must choose Hive as the Query Parser. The query parser parses the .sql file and fetches the original and target queries.
- .py files with spark queries in Transformation Output, then choose PySpark as the Query Parser. The query parser parses the .py file and fetches the original and target queries.
- .py files with hive queries in Transformation Output, then choose PyHive as the Query Parser. The query parser parses the .py file and fetches the original and target queries.
- In Functions , select Cell-by-Cell or required aggregate functions from to perform validation on the dataset.
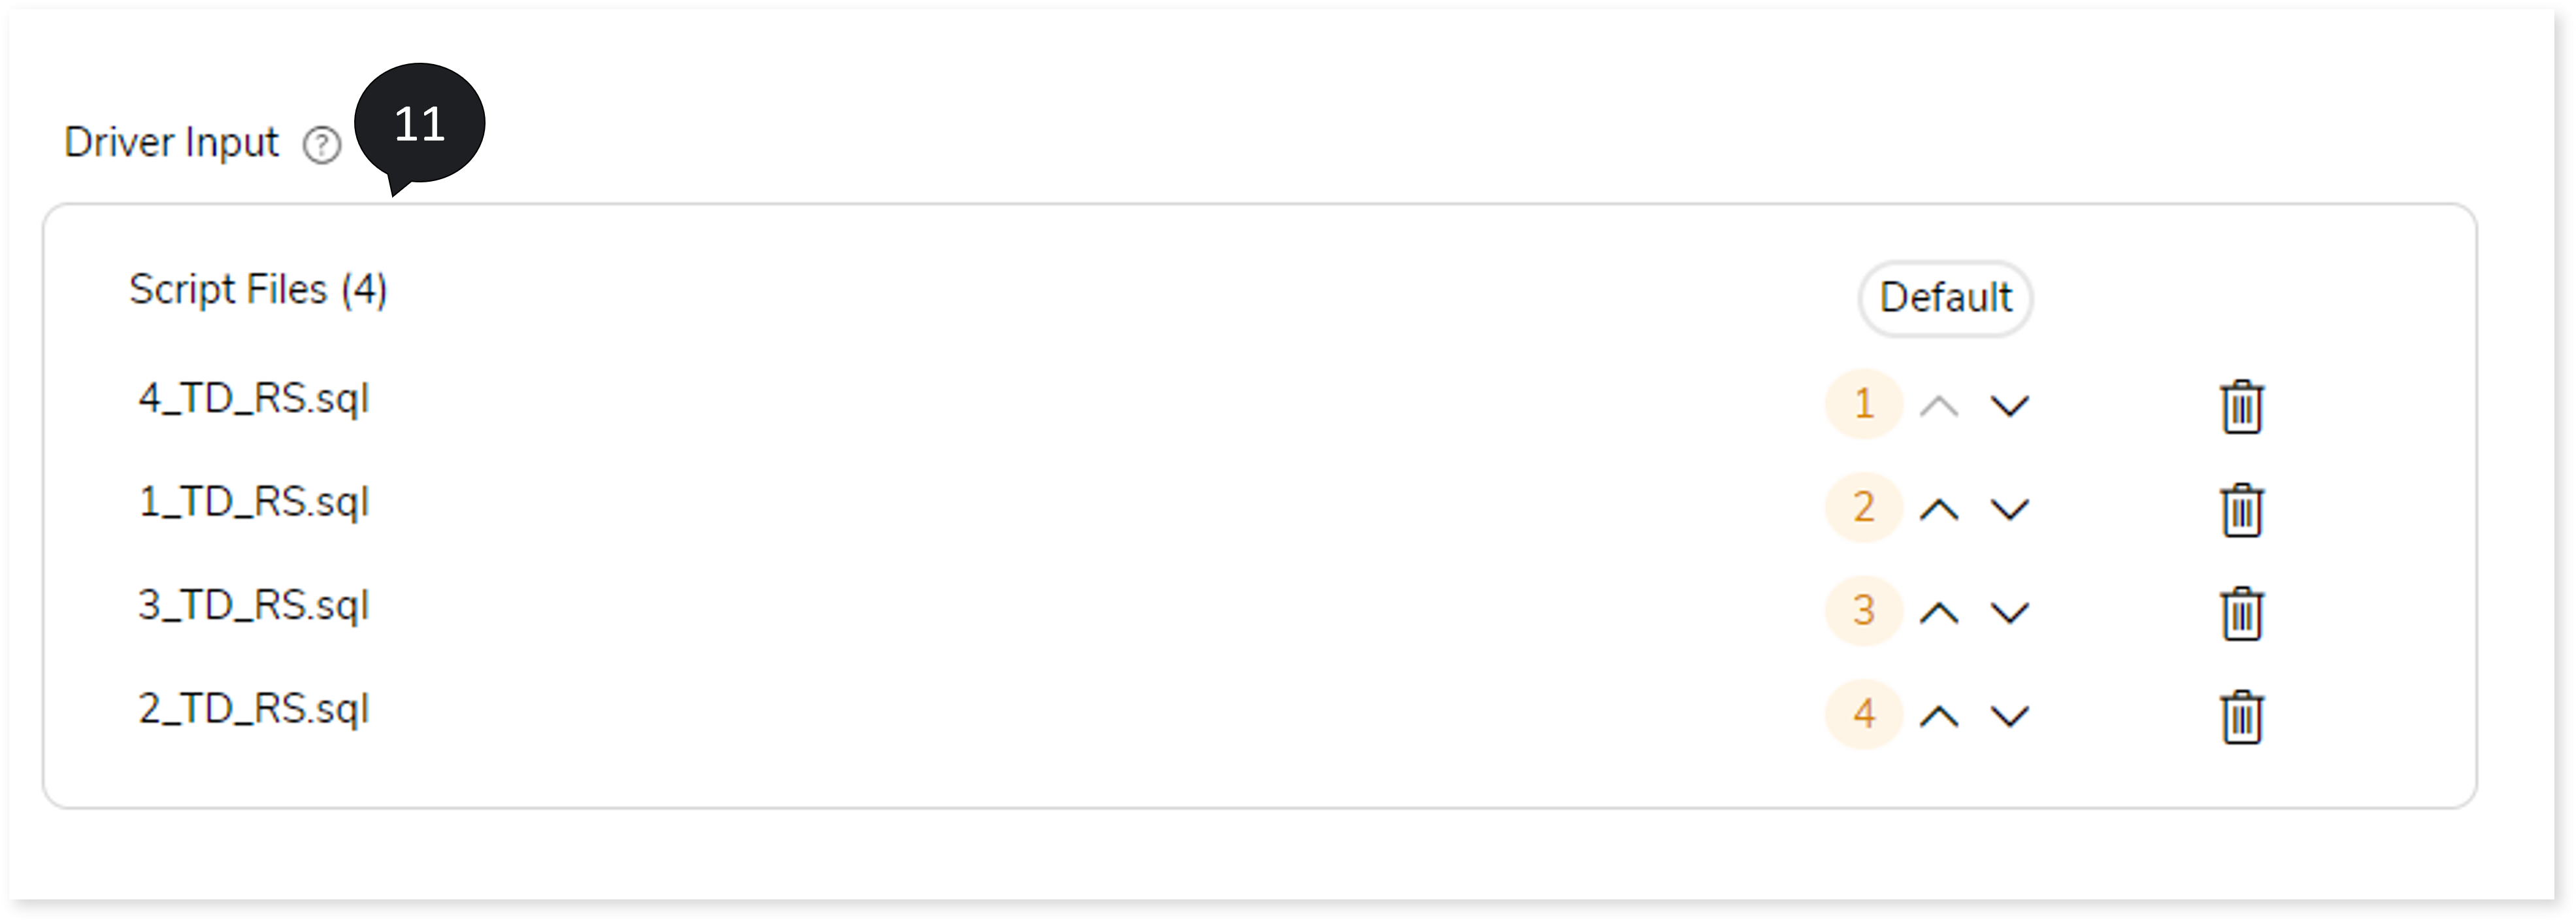
- In Driver Input, you can define the running sequences of the transformation output script.
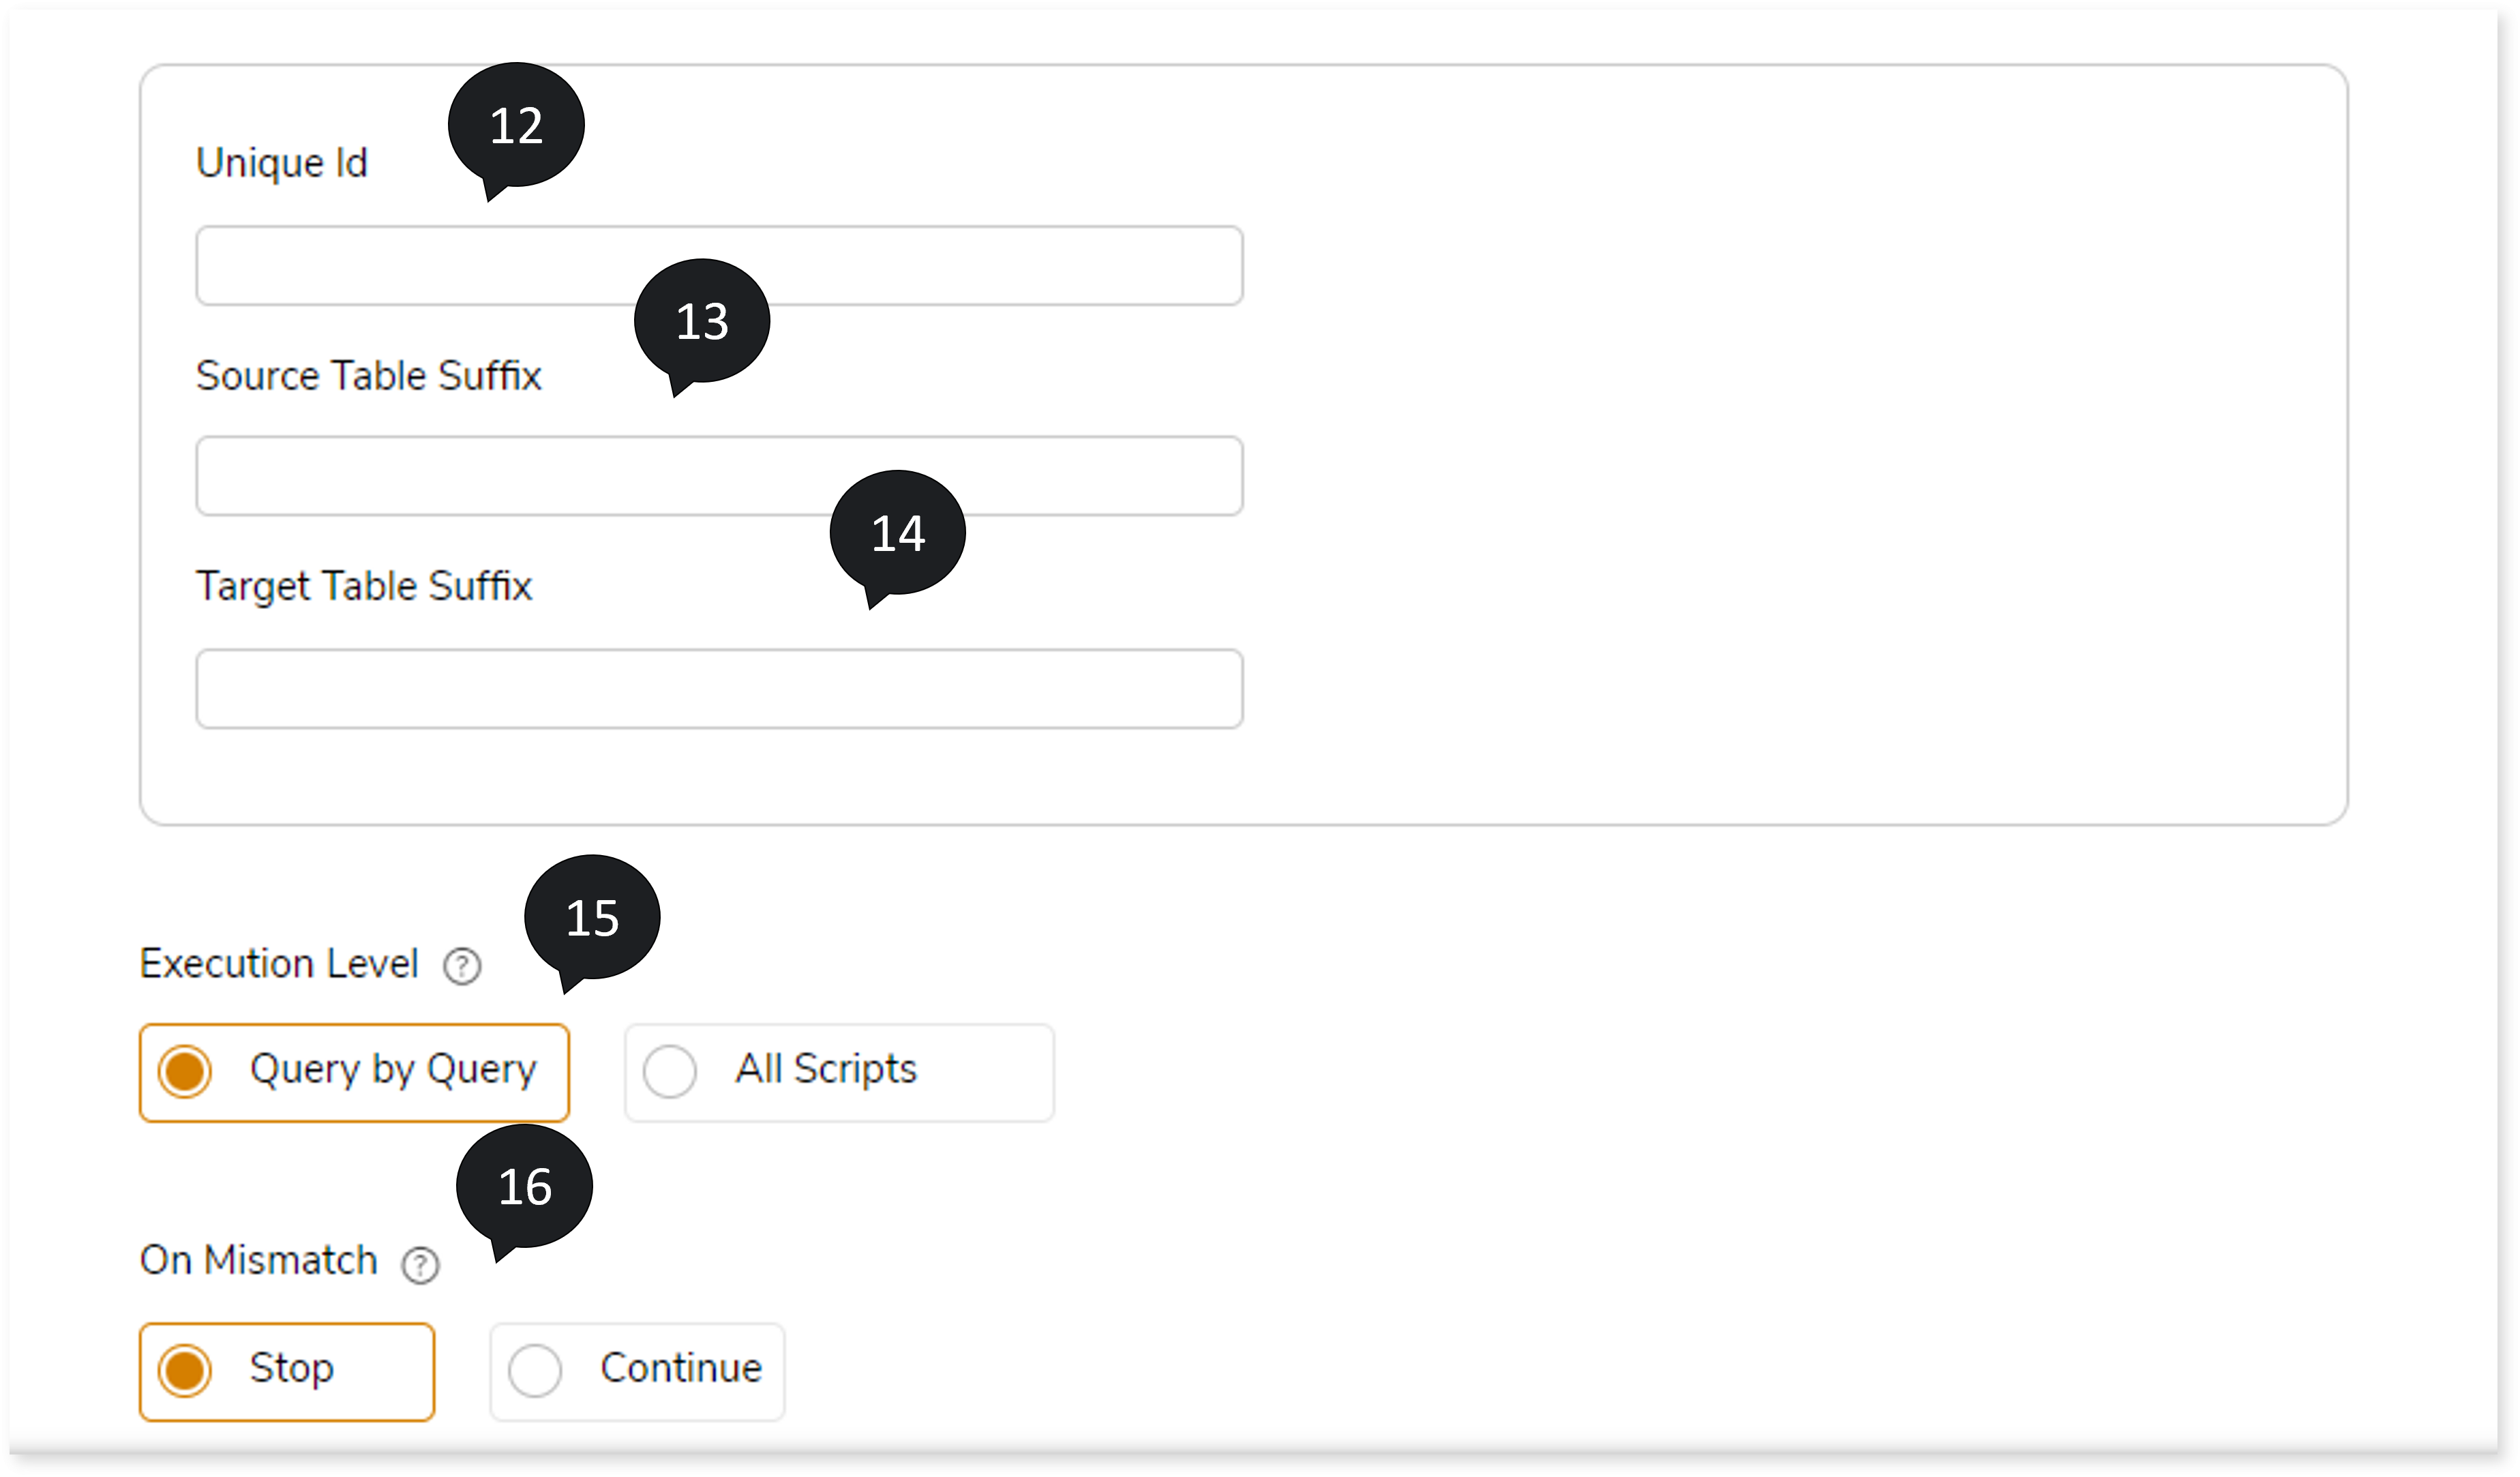
- In Unique ID, provide the unique id that is appended to the original table name copy on which the validation is performed.
- In Source Table Suffix, provide the source table suffix in the source table copy for comparison.
- In Target Table Suffix, provide the target table suffix in the target table copy for comparison.
- Select the Execution Level such as Query by Query or All scripts, where Query by Query validates at a query level while All scripts validates all the scripts in one go.
- In On Mismatch , select option based on which you can Continue or Stop the validation whenever the system encounters a mismatch.
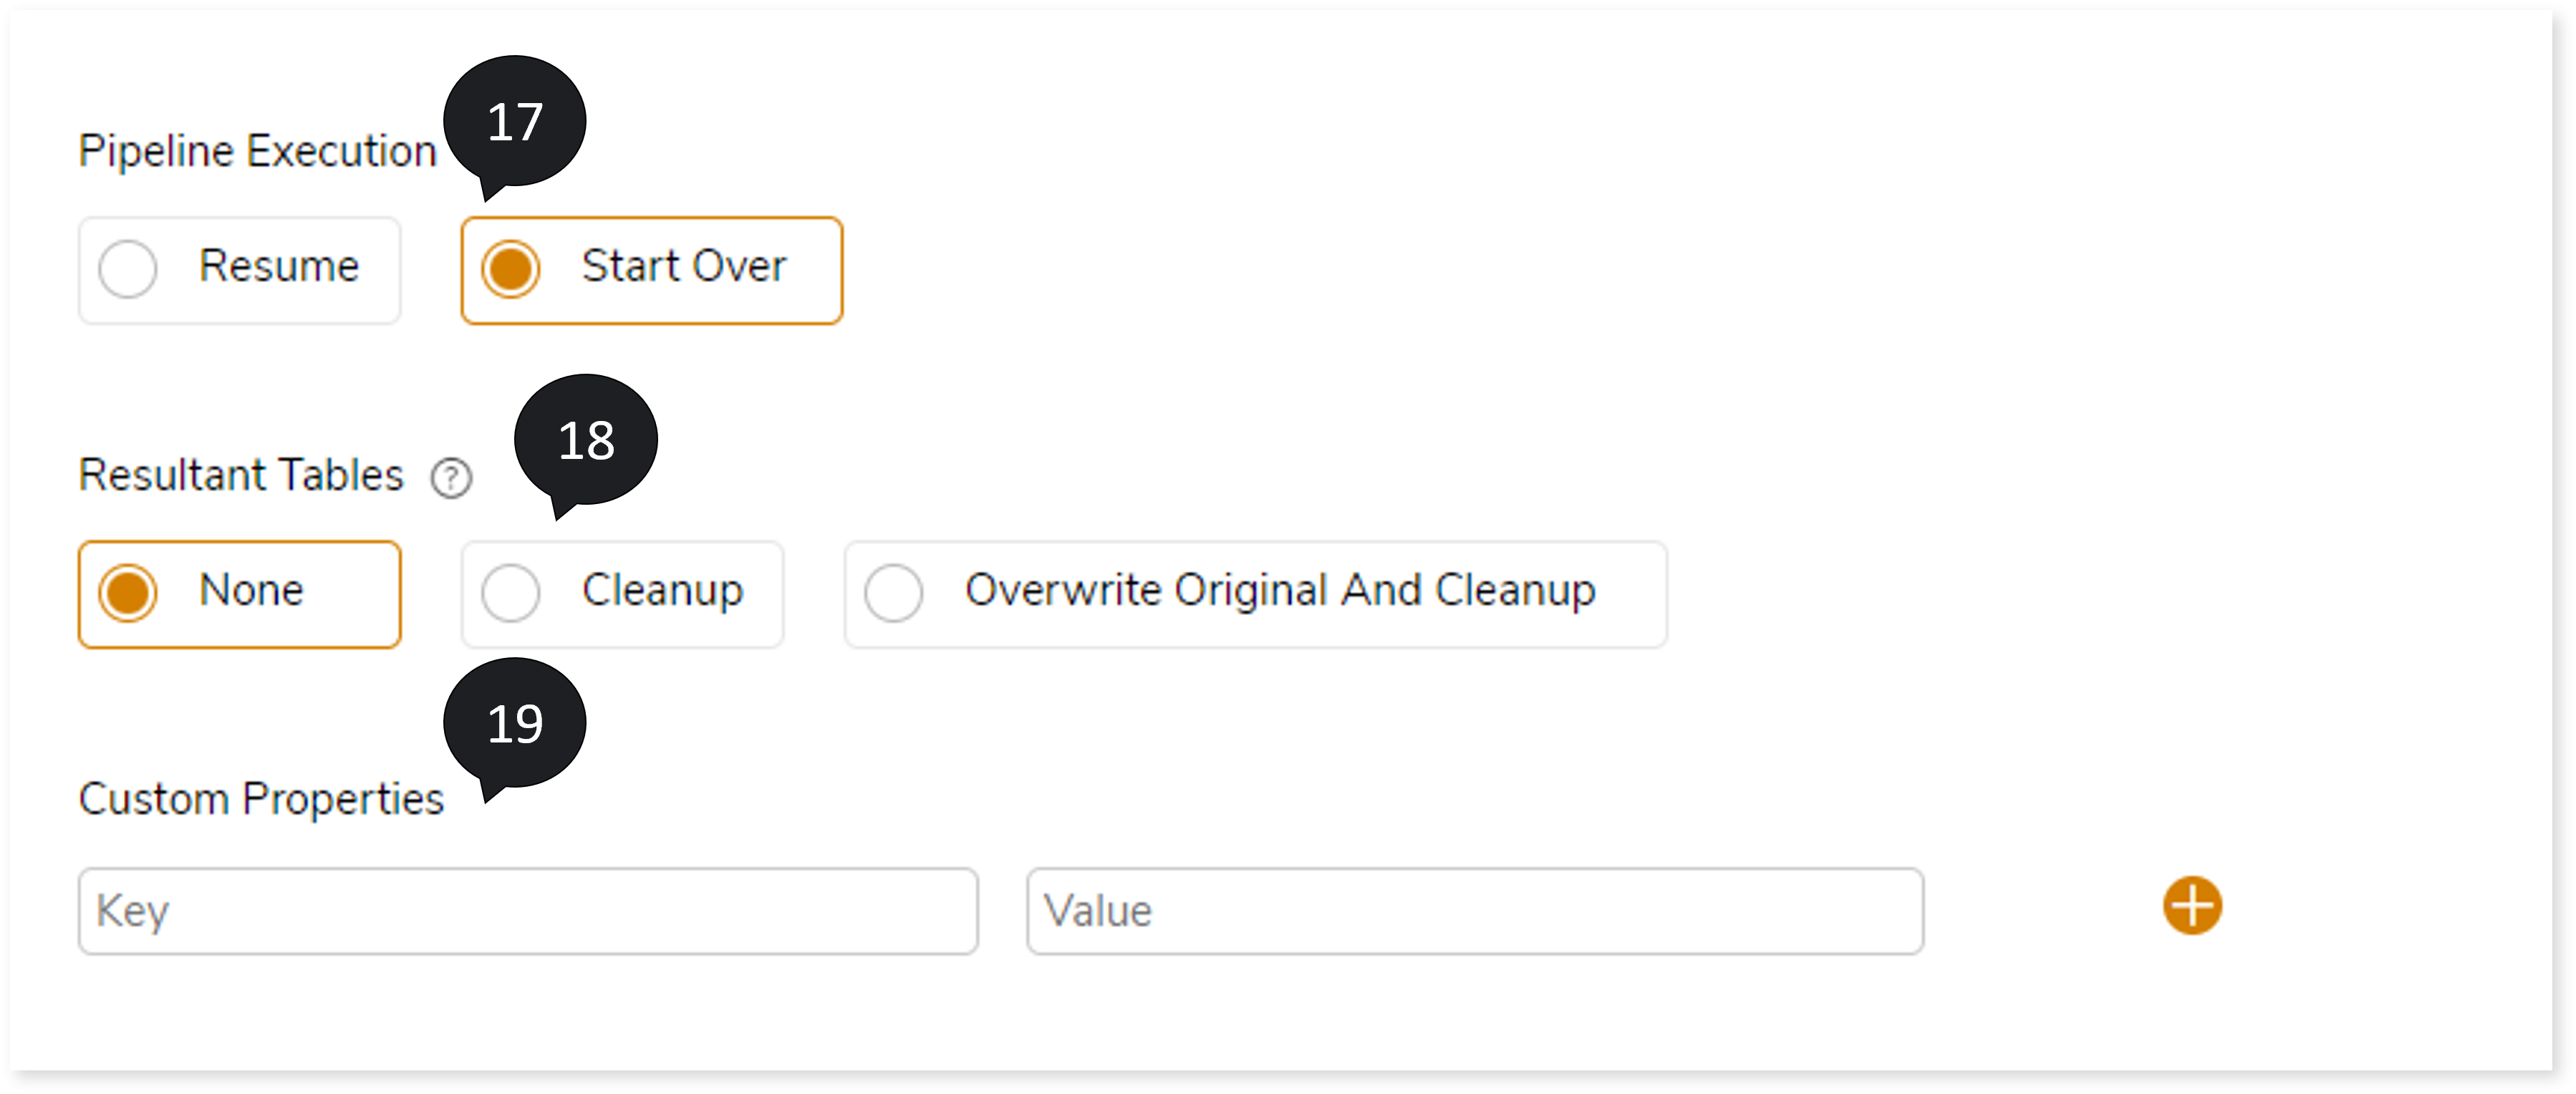
- In Pipeline Execution , select Resume or Start Over to resume or start over the validation if the selected On Mismatch option is Stop.
- In Resultant Tables, select None, Cleanup or Overwrite Original And Cleanup, where:
- None: To retain both original and intermediate table as is.
- Cleanup: To clean up all the intermediate tables
- Overwrite Original And Cleanup: To overwrite the original (source) table with the new intermediate table and cleanup the other leftover tables.
- In Custom Properties, enter the Key and Value. For any parameterized queries, you can replace the value at execution/run time, which can be passed here as keys and values.
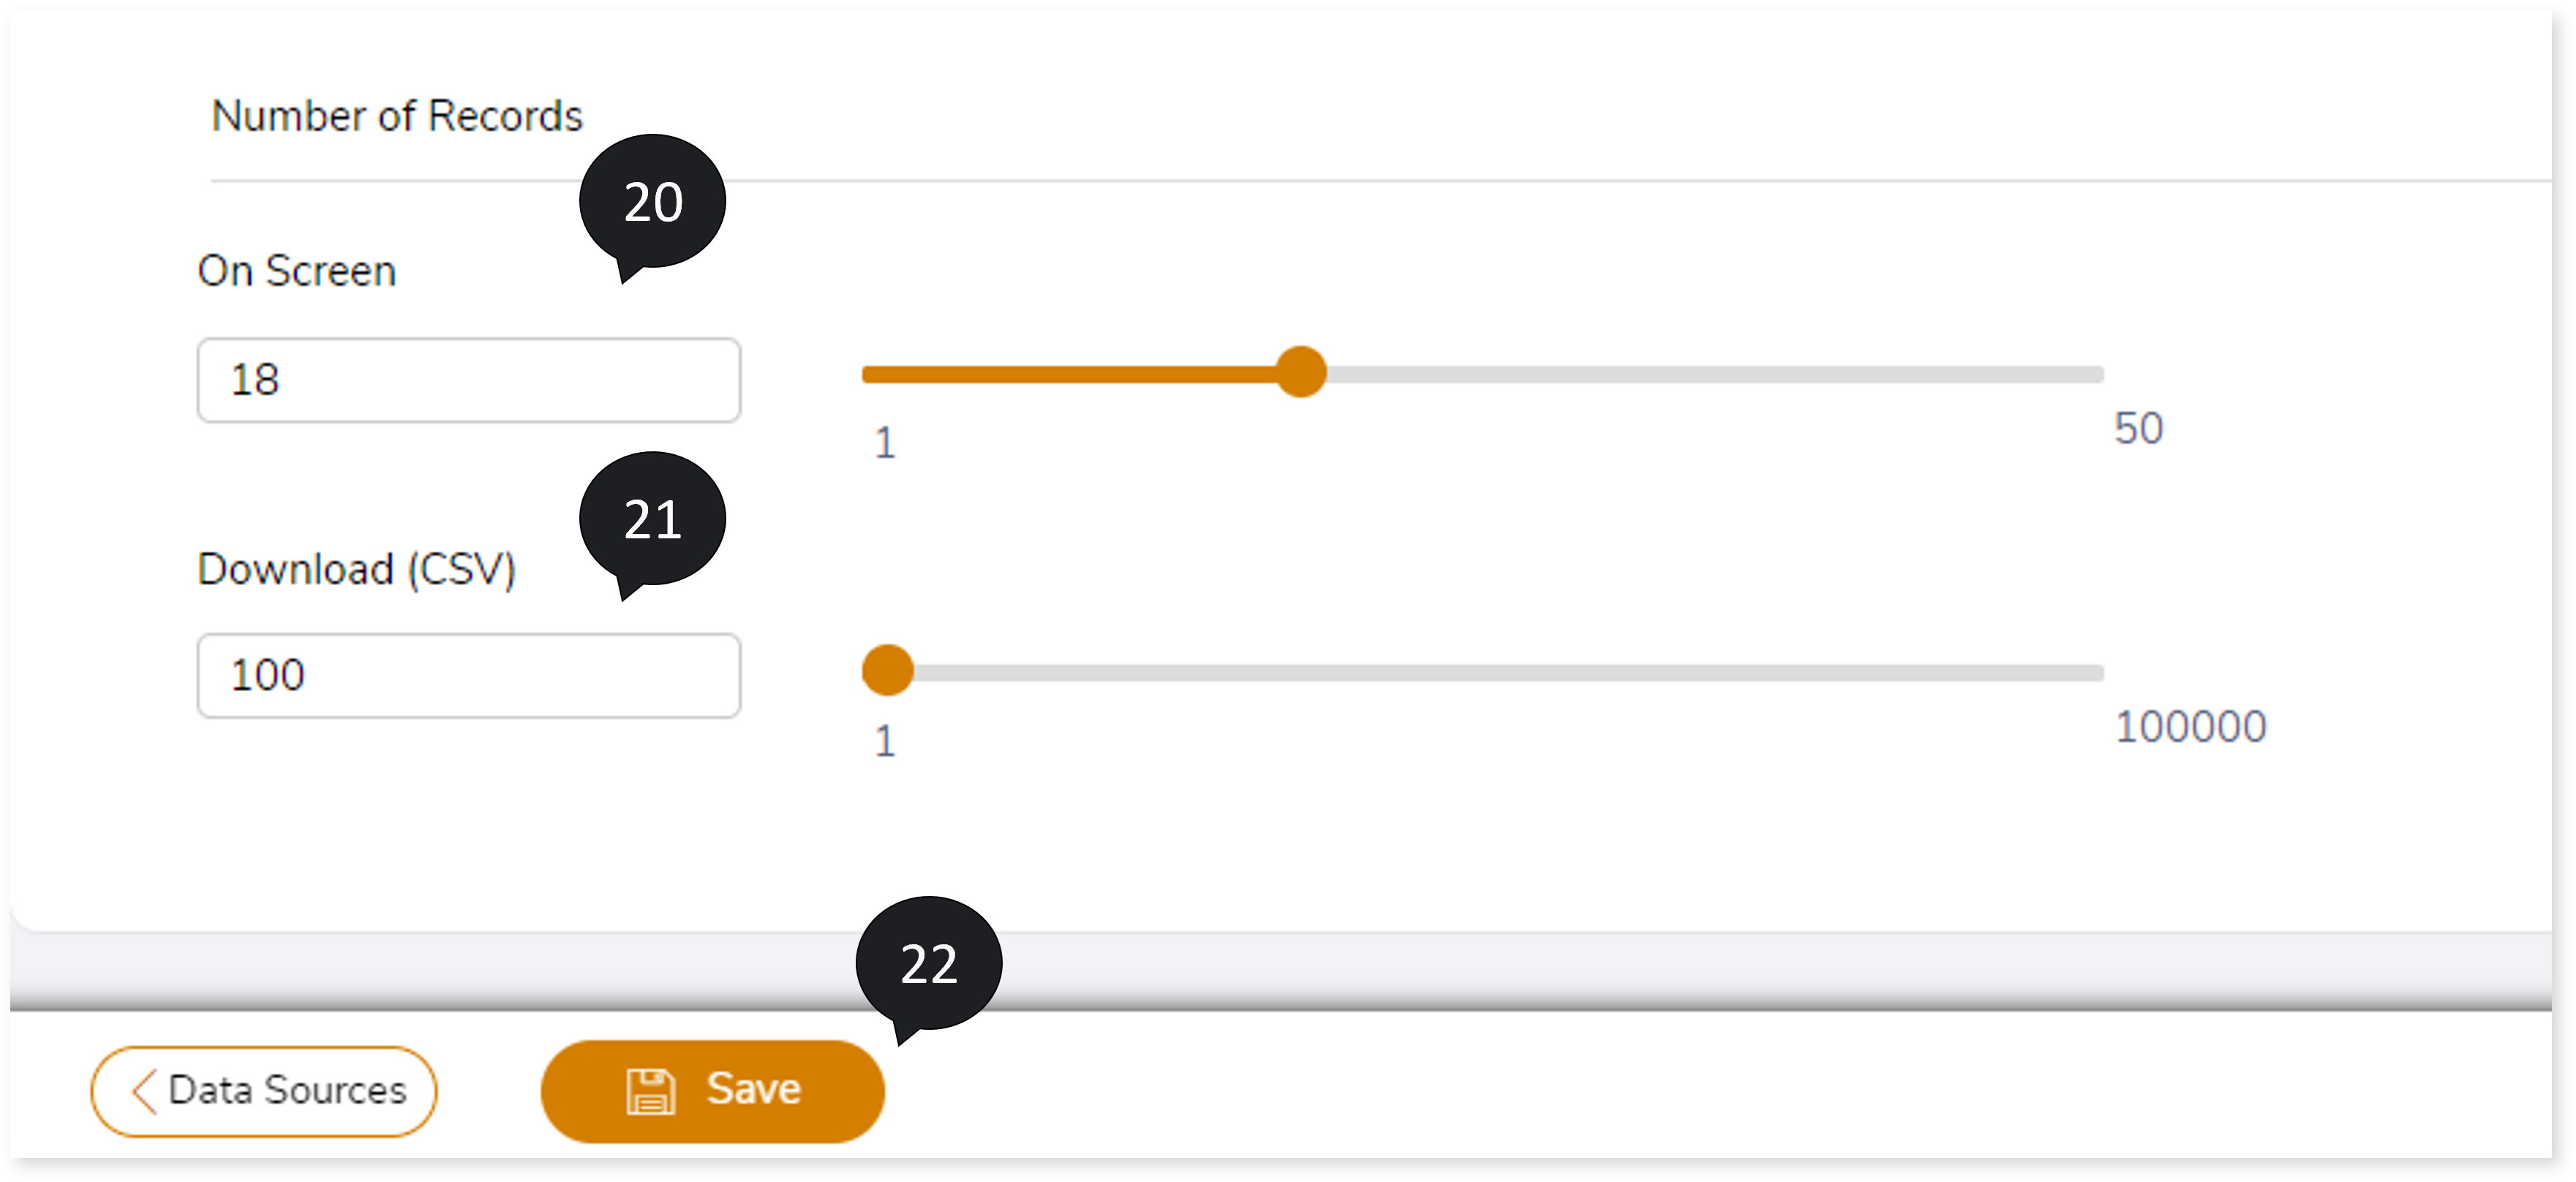
- In On screen, select the value from the sliding bar to decide how many records need to be displayed on the UI.
- In Download (CSV) , choose the value from the sliding bar to display the maximum number of mismatched records for downloaded reports.
- Click Save to save the Validation Stage. The system displays an alerting snackbar pop-up to notify the success message when the Validation stage is successfully saved.
Configuring Query Validation (When Data is Not Available)
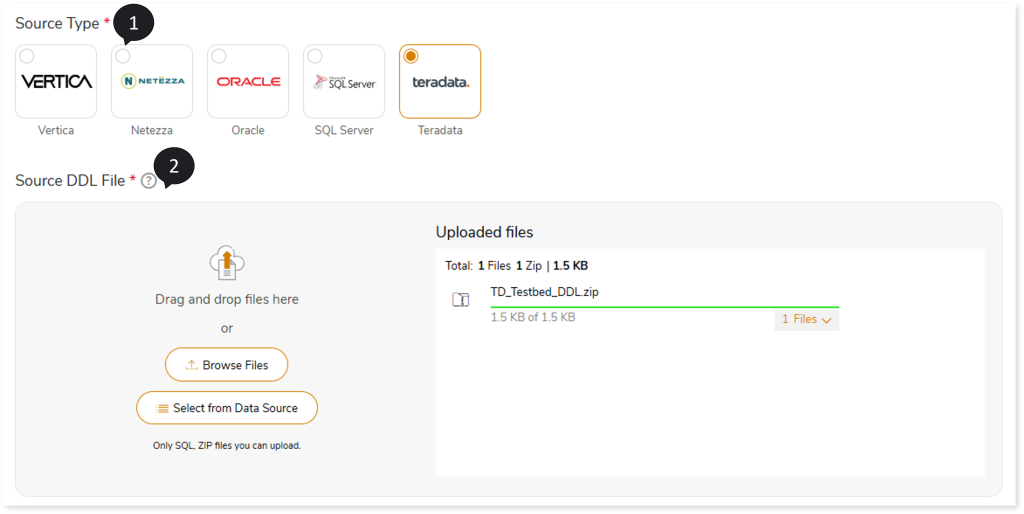
- In Source Type, select the source type such as Vertica, Oracle, SQL Server, Teradata, or Netezza.
- In Source DDL File, upload the ddl file via:
- Browse Files: To select the file from the local system.
- Select From Data Source: To select the file from the data source.
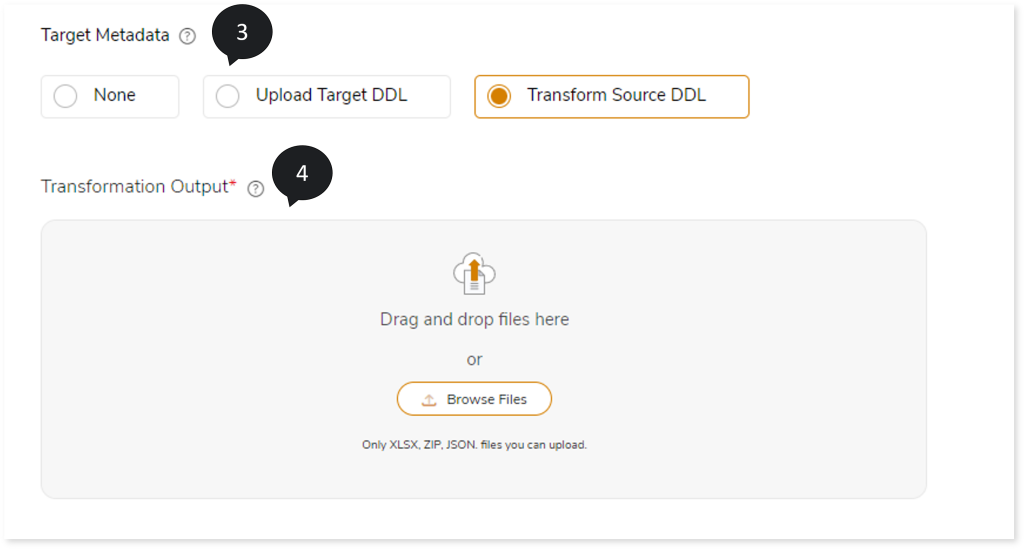
- Choose the Target Metadata as:
- None: Does not execute the source DDL. The missing target tables will be created during the execution of the respective queries.
- Upload Target DDL: To execute the target DDL scripts and create the target schema. In Target DDL File, you can upload the target DDL files.
- Transform Source DDL: Transforms the source DDL to the target equivalent format and executes it on the target.
- In Transformation Output, upload the Transformation stage output file to map the original and transformed queries. An integrated pipeline does not require the Transformation Output files to be uploaded. As part of the pipeline execution, the system automatically fetches the data from the Transformation stage.
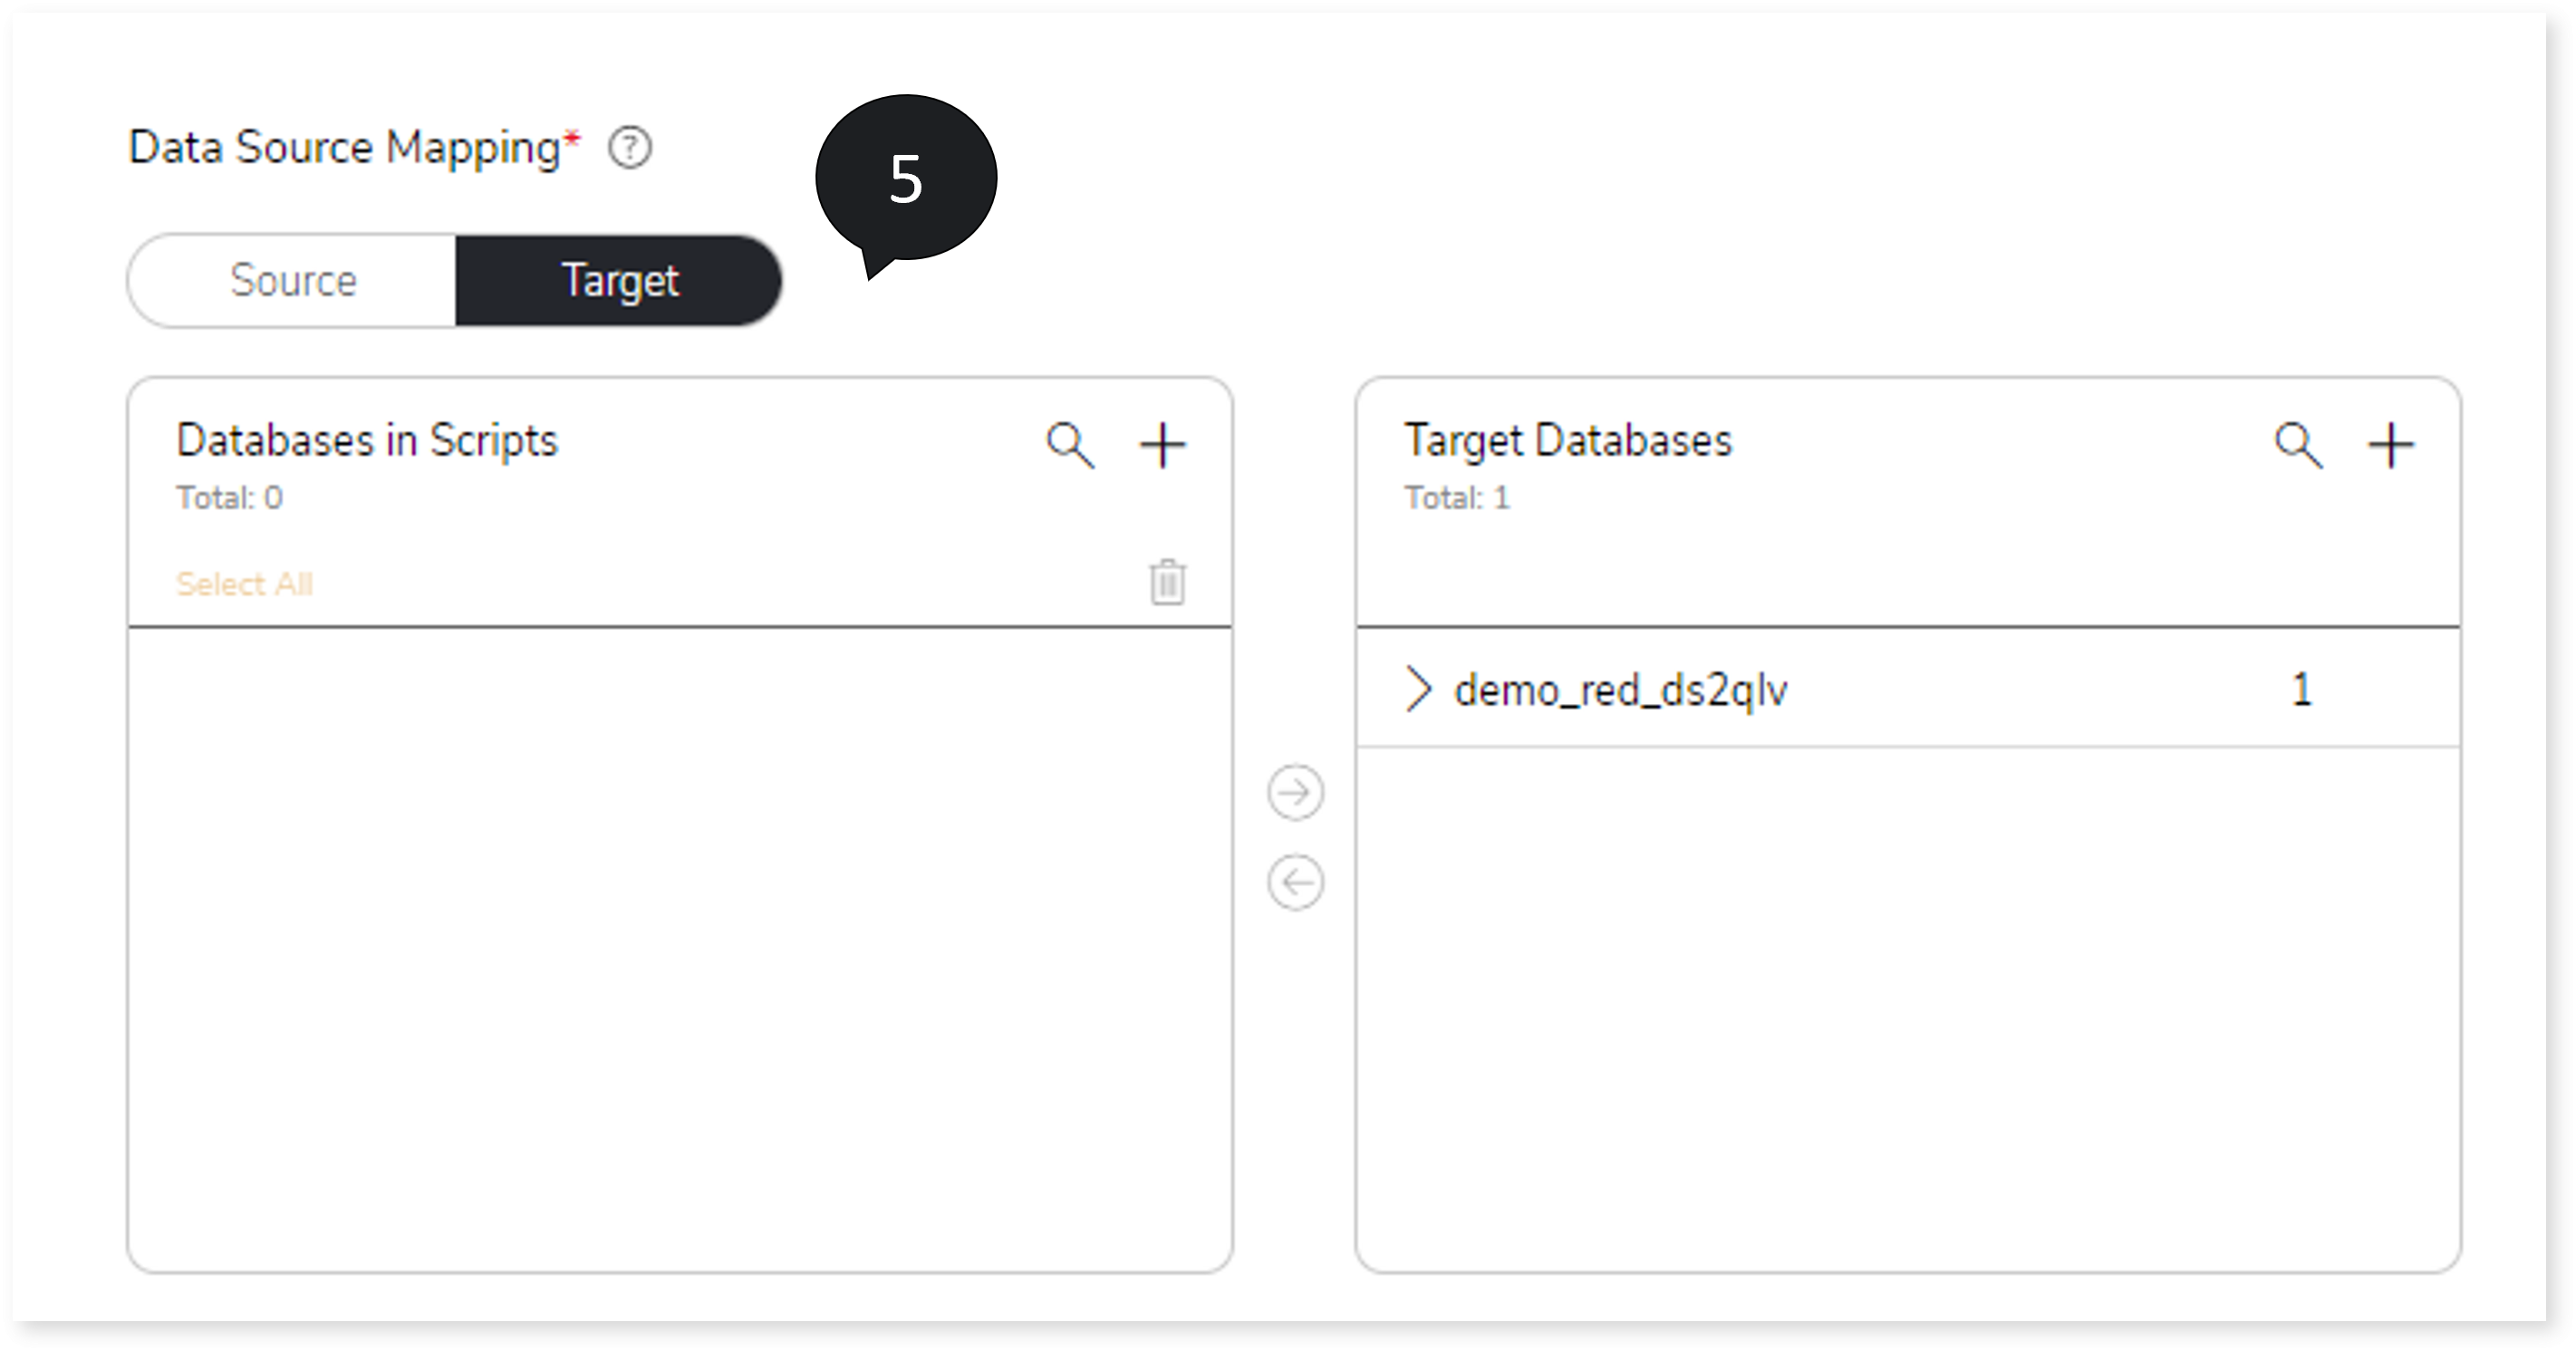
- In Data Source Mapping, map the database in the script with the source and target databases. To do so,
- In the Source/Target tab, two cards are available:
- Databases in Scripts
- Source Databases/Target Databases
The Databases in Scripts card contains all the databases available in the selected script. The database(s) displayed in the Databases in Scripts card must be mapped to the Source Databases/ Target Database card.- Click + on the Source Databases/Target Databases card and add the dummy database. To add the database, follow the steps below:
- Click + on the Source Databases/Target Databases card.
- Choose repository.
- Select data source.
- Click
 to save the source/ target data source.
- To map the database(s) in the Databases in Scripts card to the Source Databases/ Target Databases card, follow any of the steps below.
- Drag and drop the database in the Databases in Scripts card to the database in the Source Databases/Target Databases card.
- Click the checkbox of the preferred database available in the Databases in Script card and then click the preferred database in the Source Databases/ Target Databases card.
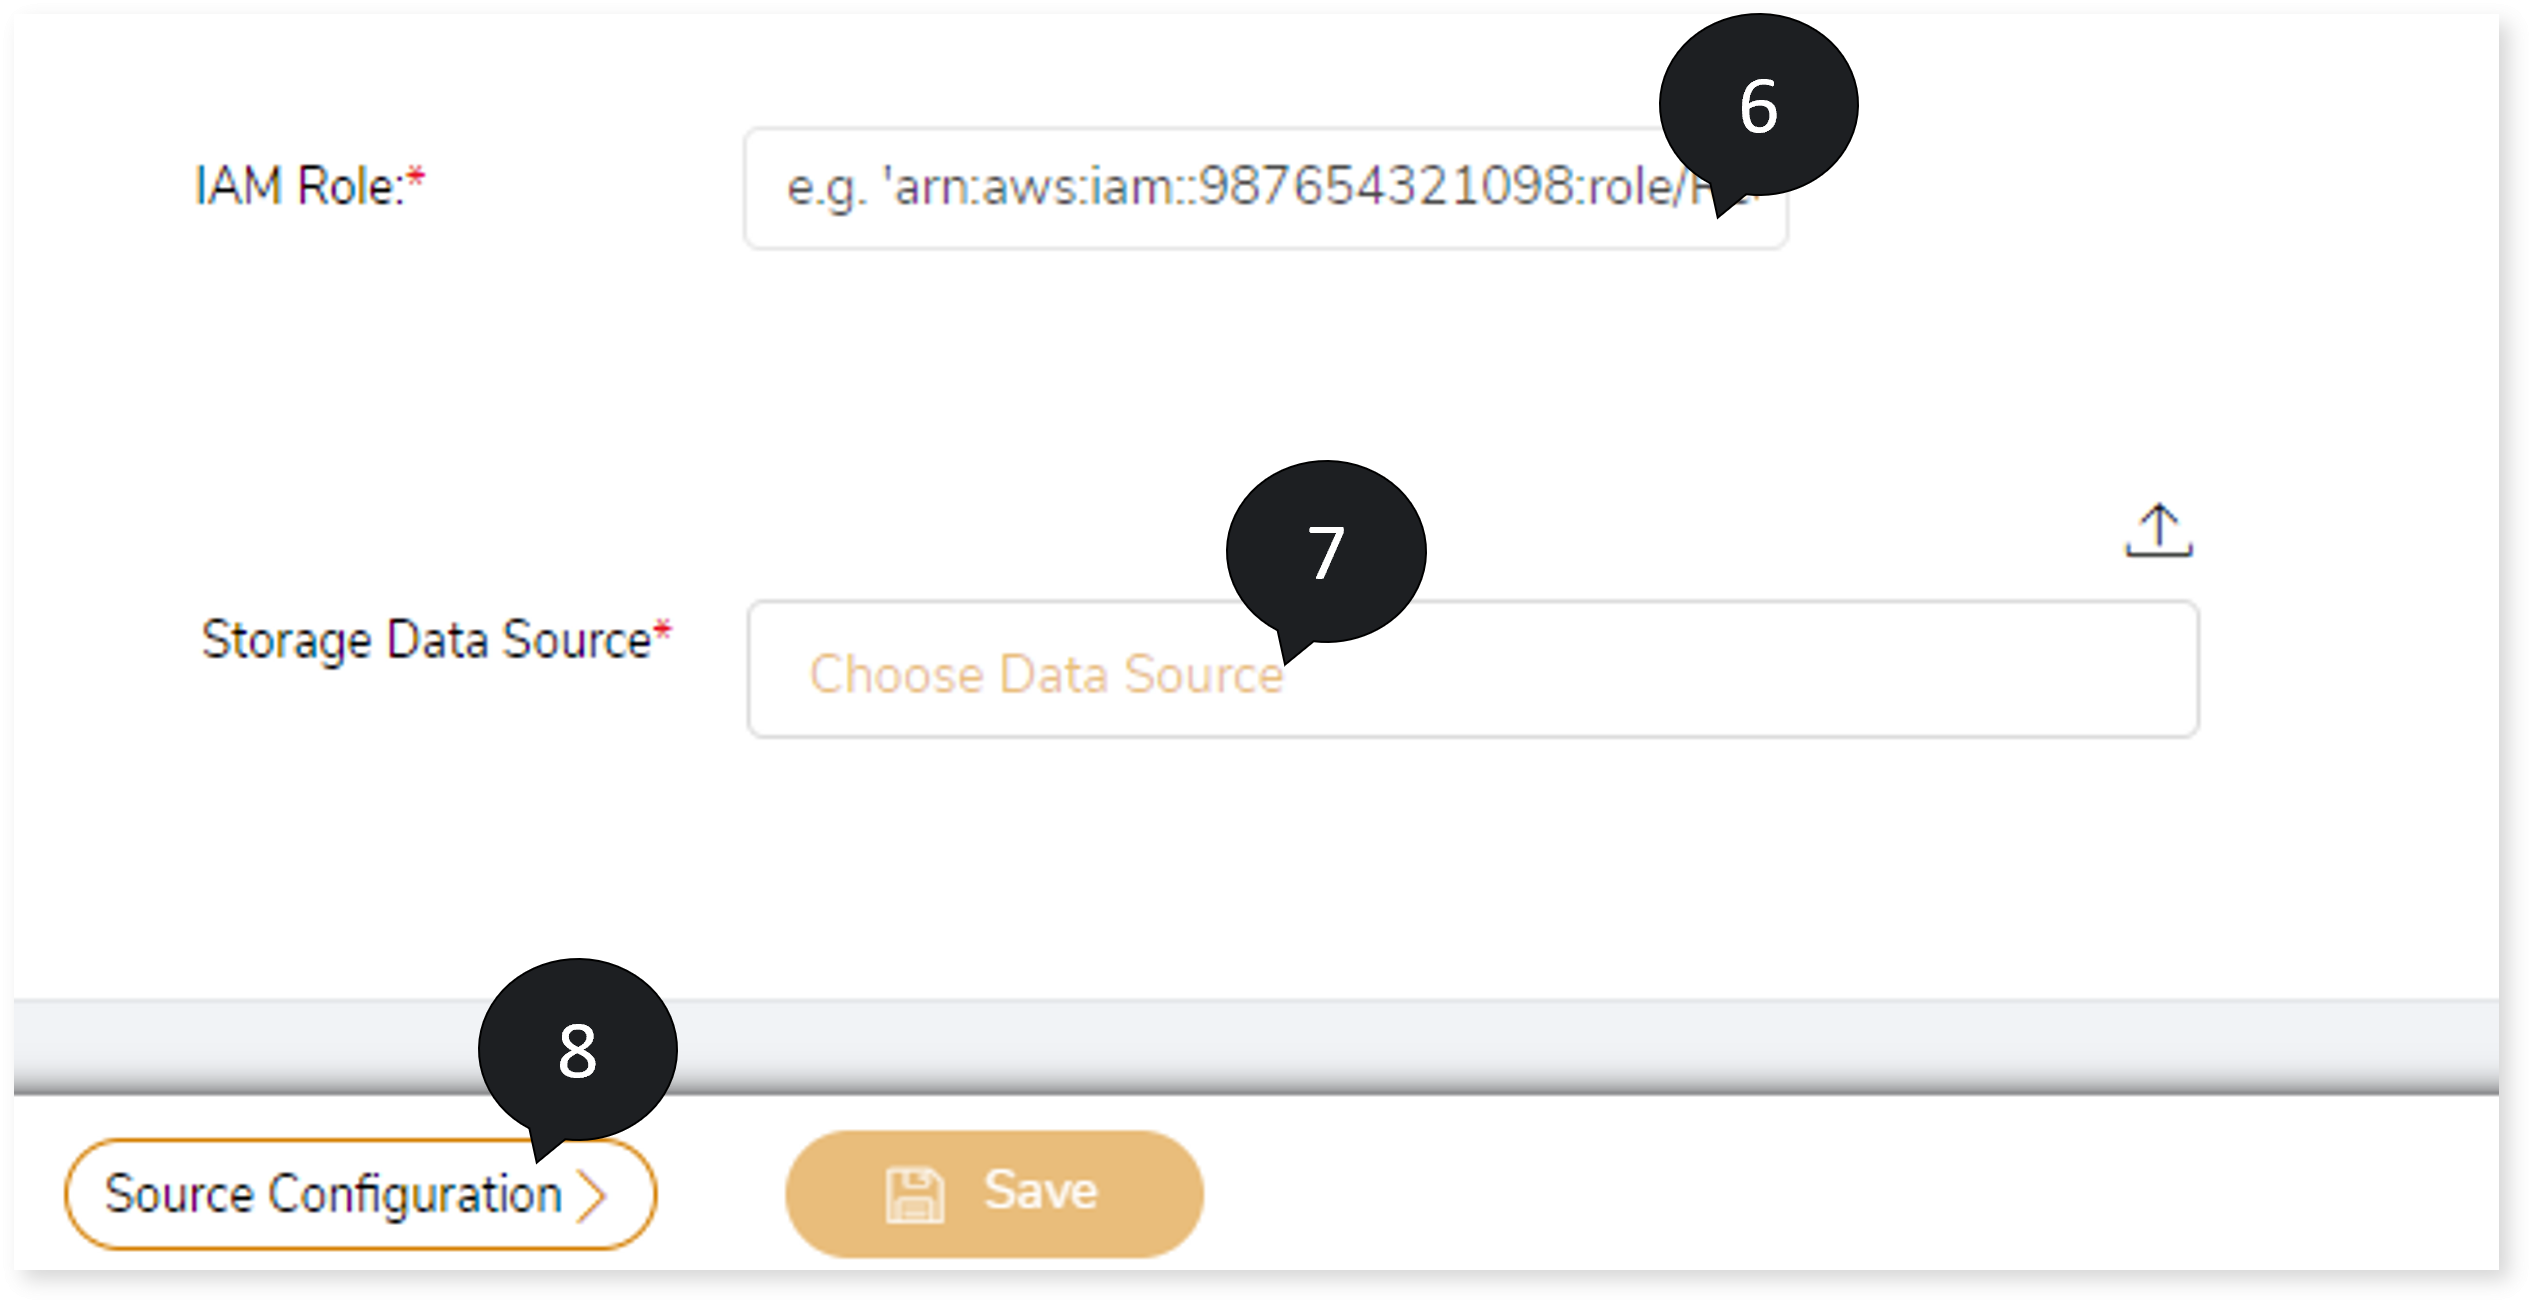
- In IAM Role, assign IAM role.
- In Storage Data Source, upload the storage data source.
- Select the Source Configuration.
- In Stop On, select the criteria to stop the validation. The criteria are:
- Data Generation Issue
- Not Matched
- Error
- Explain Plan Error
- In Population Size, select the value from the sliding bar. It defines the size of raw sample data generated for comparison by data generator.
- In Number of Records, select the value from the sliding bar to choose the best data sample for comparison.
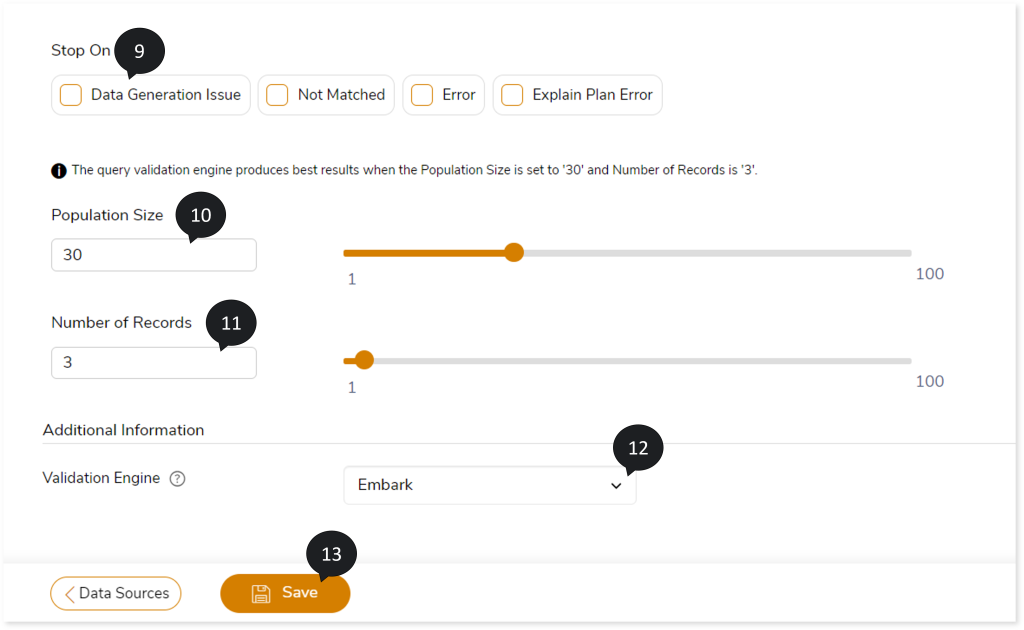
- In the Validation Engine, select the engine based on which you need to generate the test data. The Validation Engine options include:
- LeapLogic Engine: Select this to auto-generate the test data based on the native LeapLogic engine for validating queries against the source and target data.
- Embark: Select Embark pretrained model to auto-generate the test data for validating queries against the source and target data.
- Click Save to save the Validation Stage. When the Validation stage is successfully saved, the system displays an alerting snackbar pop-up to notify the success message.

- Click
 to execute the integrated or standalone pipeline. The pipeline listing page opens. The pipeline listing page displays your pipeline status as Running state. When execution is successfully completed status changes to Success.
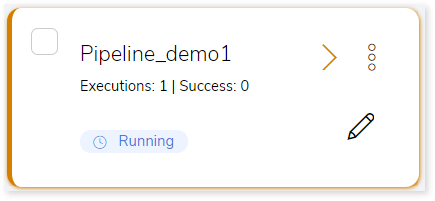
- Click on your pipeline card to see reports.
To view the Query Validation Stage report, visit Query Validation Report.