Configuring Cloud-to-Cloud Transformation
Cloud-to-cloud transformation is a process of transforming all workloads from an existing cloud to a modern cloud. In other words, moving from one cloud to another. This topic provides steps to configure cloud-to-cloud transformation. To do so, follow the below steps.
- In Source Type, select the cloud source data store such as Snowflake.
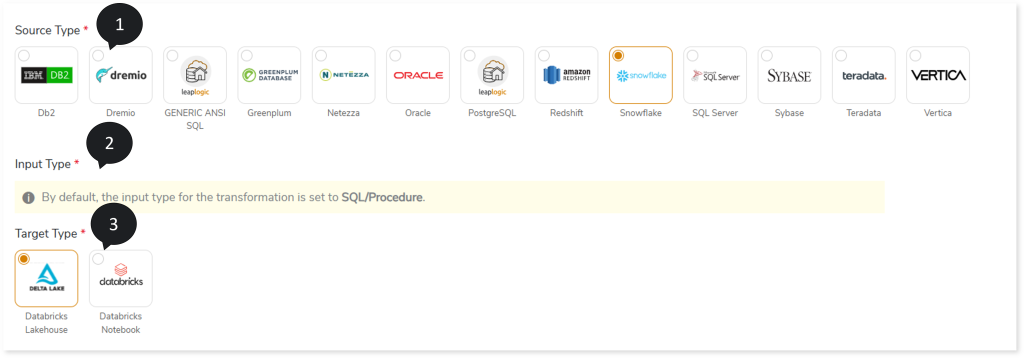
- In Input Type, the default input type for the transformation is set to SQL/Procedure.
- In Target Type, select the preferred target type, such as Databricks Lakehouse or Databricks Notebook.
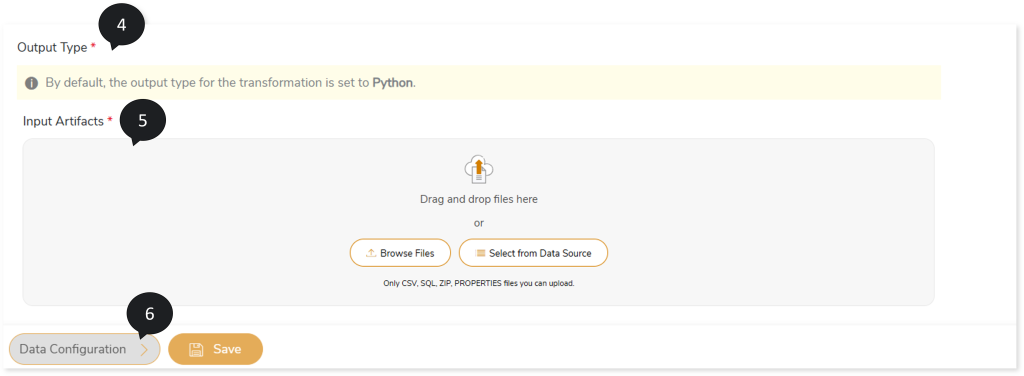
- In Output Type, the default output type for the transformation is set to Python.
- In Input Artifacts, upload the files that you need to transform to the target source.
- Click Data Configuration to configure the data.
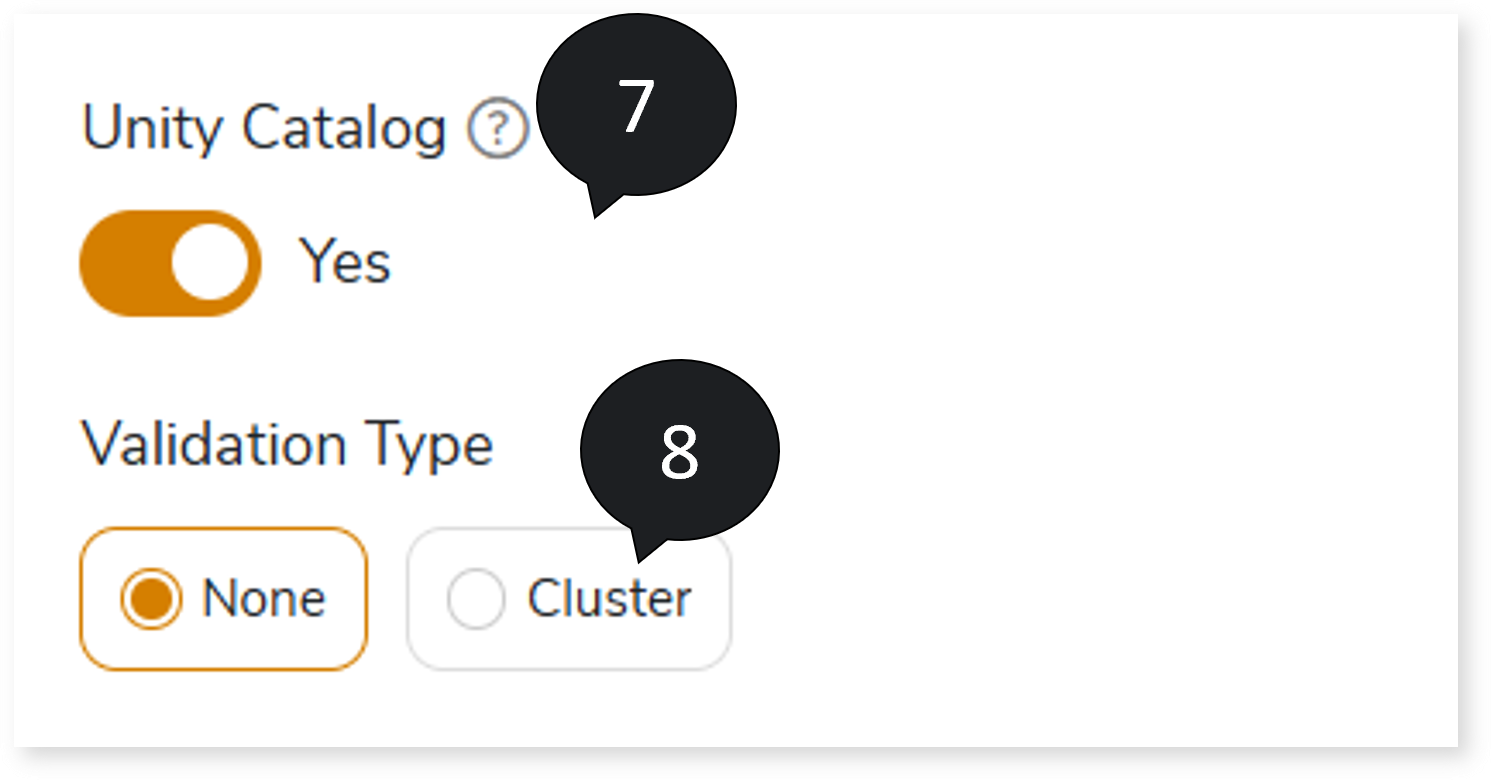
- If the selected target is Databricks Lakehouse, enable Unity Catalog to transform the constraints such as primary key, foreign key, etc., present in the source data to the Databricks-native equivalent. Otherwise, the default Hive meta store will be used, and Hive or Spark tables will be generated without any constraints. In Databricks, there are two types of catalogs:
- Hive Meta store: Hive meta store serves as a central repository to create, store, and manage large datasets or tables. However, it does not support constraints like primary key, foreign key, etc.
- Unity Catalog: Unity Catalog in Databricks serves as a centralized metadata repository with advanced metadata management features that support constraints including primary key, foreign key, etc. It serves as a comprehensive repository for storing metadata information within Databricks.
- In Validation Type, select the validation type:
- None: Performs no validation.
- Cluster: Validates the queries that are transformed by the LeapLogic Core transformation engine.
- In AI Augmentation, select the preferred Transformation and Review models to convert queries that require augmented transformation and perform syntax validation for accuracy and optimal performance. To convert queries using AI Augmentation, you must provide the source and target combinations in the Add New Sources and Targets page (Governance > Intelligence Modernization > Custom Source/ Target > Add New Sources and Targets).
To view the detailed steps for adding source and target combinations in the Add New Sources and Targets page, click here.
- In Transformation Model, select the preferred Transformation model to convert queries that are not handled by the default LeapLogic Core transformation engine to the target equivalent. The Transformation Model supports both Open-Source AI models (LeapLogic) and Enterprise AI models (Databricks AI and Amazon Bedrock such as Claude, Nova, etc.) for query transformation. It also identifies query types even if conversion fails.
The Open-Source AI models include:
- OpenOrca 7B, GPTQ 4-bit quantized Model (Hugging Face), Llama 8B, 16-bit quantized Model (Ollama), and Llama 8B, 4-bit quantized Model (Ollama): To convert small- to medium-sized SQLs.
- Code Llama 34B, GPTQ 4-bit quantized Model (Hugging Face): To convert large-sized SQLs and procedural code.
- In Additional Prompt, provide supplementary instructions in addition to system-generated prompts. For example: Ensure the given DDL metadata is applied during conversion and validation for casting, precision, and scale based on the target system.
- In Response Fine Tuning, provide examples based on the additional prompt to fine-tune the response to align the generated output with your preferred level of detail. For example, input could be INSERT INTO CUSTOMER (cust_id, cust_name, credit_limit, discount_rate) VALUES (1, ‘JohnDoe’, 12345.6789, 0.123456); and the expected output could be INSERT INTO CUSTOMER (cust_id, cust_name, credit_limit, discount_rate) VALUES (1, ‘JohnDoe’, CAST (12345.6789,numeric(10,2)), 0.123456);
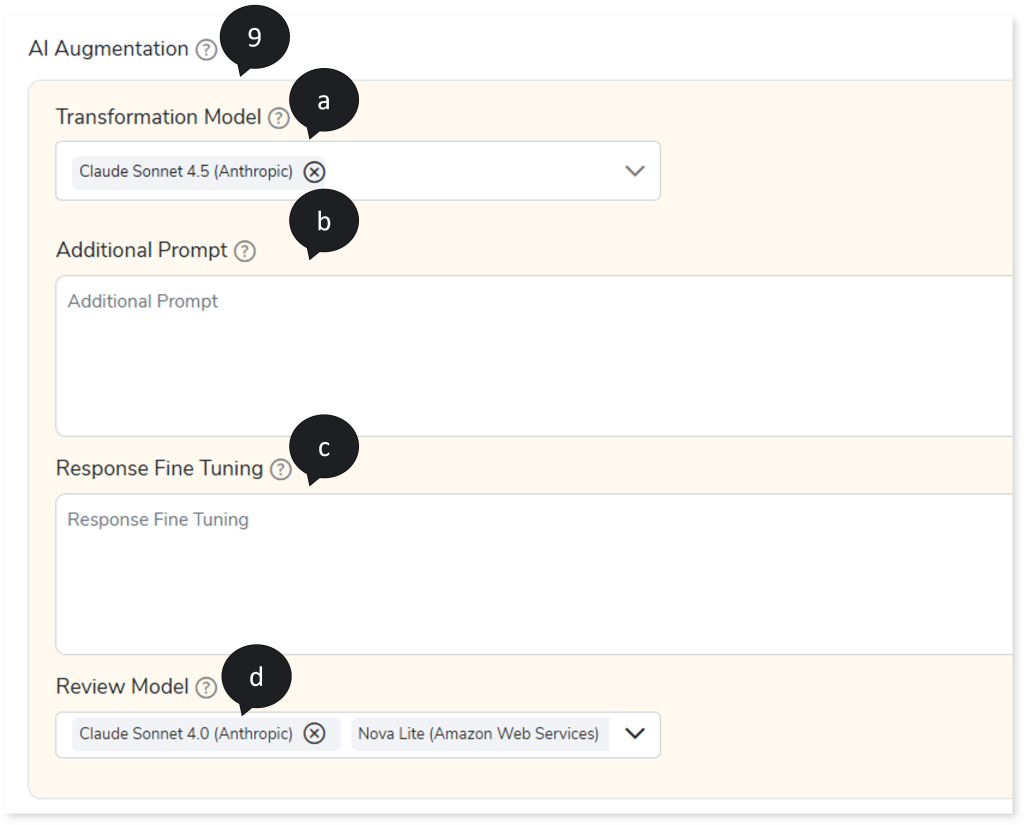
- In Review Model, select one or more Review models from to perform syntax validation on the queries transformed by the LeapLogic Core engine and the Transformation Model. The Review Model validates the transformed queries syntactically, excluding any procedural logic, and suggests corrections where required. You can configure multiple Review models. When multiple Review models are configured:
- The first Review model validates the queries transformed by the LeapLogic Core engine and the Transformer model. It validates the transformed queries syntactically, excluding any procedural logic. If any queries are identified as incorrectly transformed, it suggests updated queries.
- The updated queries are then passed to the next Review model, which validates them and suggests corrections, if required.
- This process continues through all configured Review models until the queries are successfully validated, and the optimized queries are generated.
This validation process ensures higher accuracy, better performance, and more efficient transformation.
To access this intelligent modernization feature (AI Augmentation), ensure that your account has the manager and llexpress_executor roles.
To view the detailed steps for assigning manager and llexpress_executor roles to your account, click here.
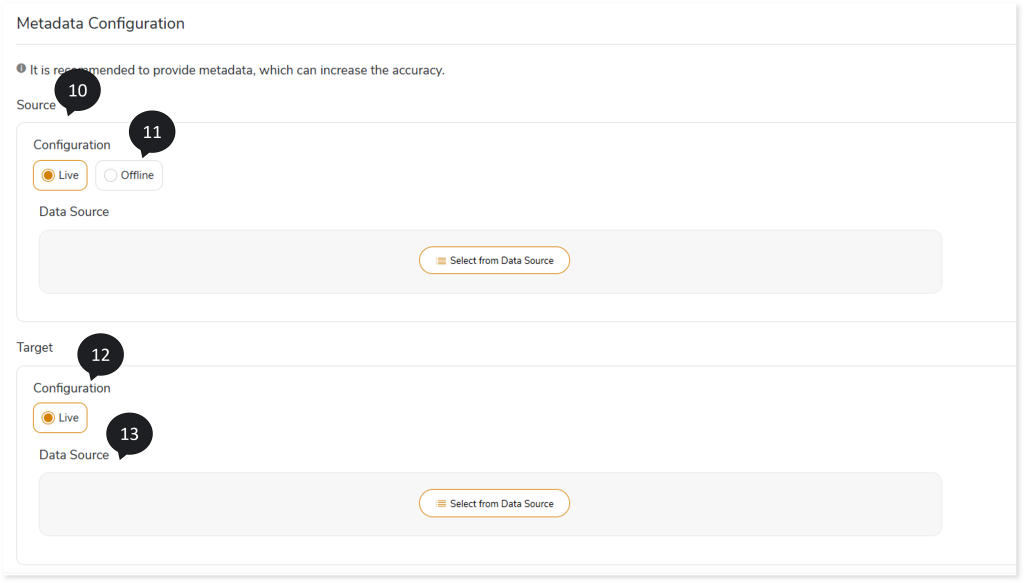
- In Source, select the configuration as Live or Offline.
- If the selected source configuration is:
- Live: Upload the data source.
- Offline: Upload the DDL files. It supports .sql and .zip file formats.
- In Target, select the configuration as Live.
- Upload the target data source.
- In File Format, select the storage type as Delta, ORC, Parquet, etc.
- In Mapping as per Changed Data Model, upload files for mapping between source and target tables.
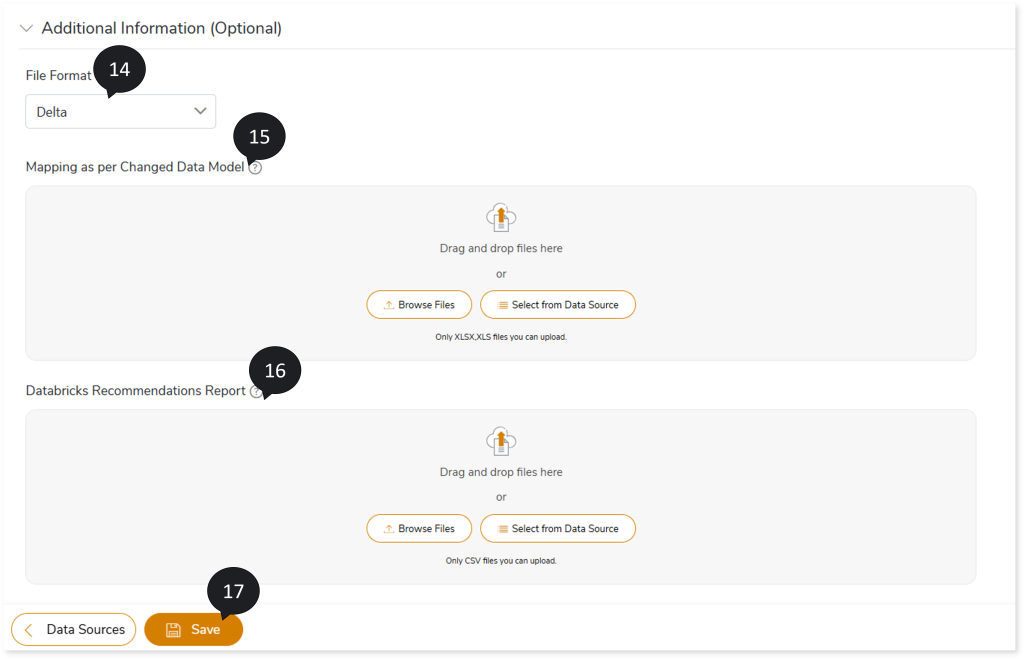
- In Databricks Recommendations Report, upload the Databricks recommendations (databricksrecommendation.csv) report generated as part of the corresponding assessment, which enables the system to incorporate relevant optimizations into the converted DDL queries.
To obtain databricksrecommendation.csv report follow the steps below:
- Go to Reports section in assessment.
- Download Insights and Recommendations.
- The downloaded archived file contains the databricksrecommendation.csv report. If required, you can update details such as cluster_by_columns.
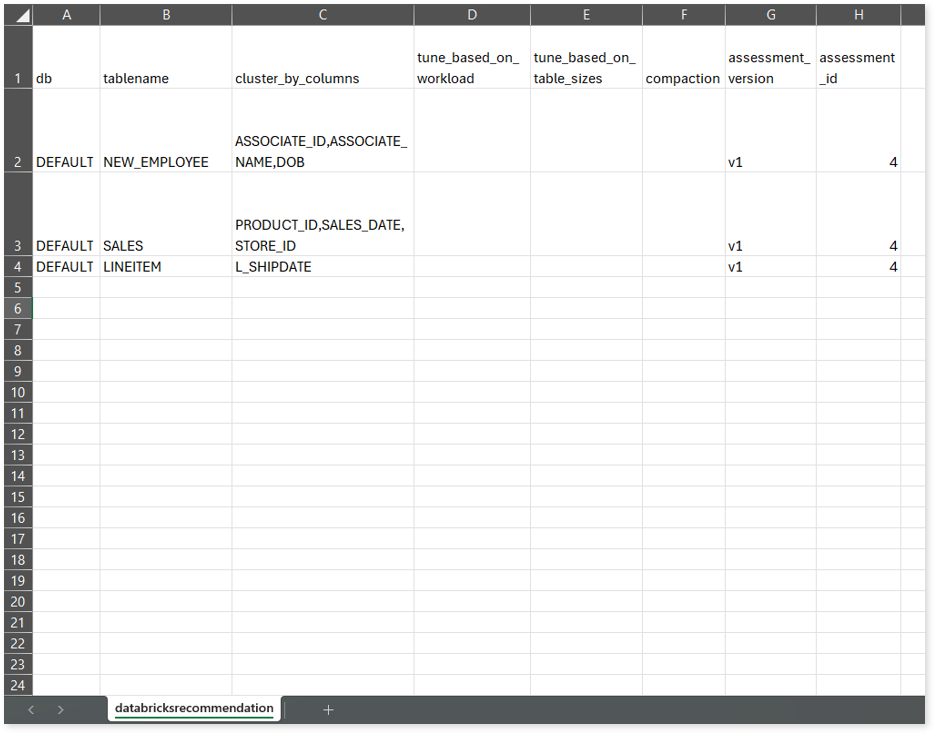
- Upload databricksrecommendation.csv file in the Databricks Recommendations Report field.
- Click Save to save the Transformation stage.
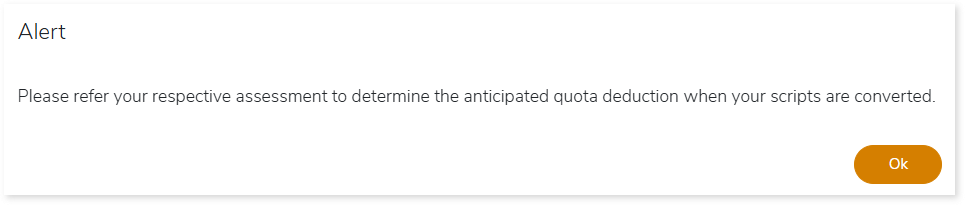
- An alert pop-up message appears. This message prompts you to refer to your respective assessment to determine the anticipated quota deduction when converting your scripts. Then click Ok.
- Click
 to provide a preferred pipeline name.
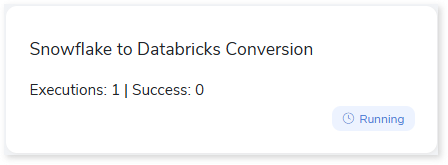
- Click the Execute icon to execute the integrated or standalone pipeline. Clicking the Execute icon navigates you to the pipeline listing page which shows your pipeline status as Running state. It changes its state to Success when it is completed successfully.
- Click on your pipeline card to see reports.
To view the Cloud-to-Cloud Transformation, visit Cloud-to-Cloud Transformation Report.