Configuring File Validation Stage
File validation stage validates dataset between source and target available in flat/delimited files. Here it is comparing either two XML files or TXT files to check whether those two files are same or not.
In This Topic:
Overview
In this section, you can customize the name for the File Validation stage and can give a suitable description that describes the purpose and scope of the stage. By default, File Validation is provided in the Name field.

Transform
The input to this transformation is typically either two XML files or TXT files.
To configure the File Validation stage, follow the steps below:
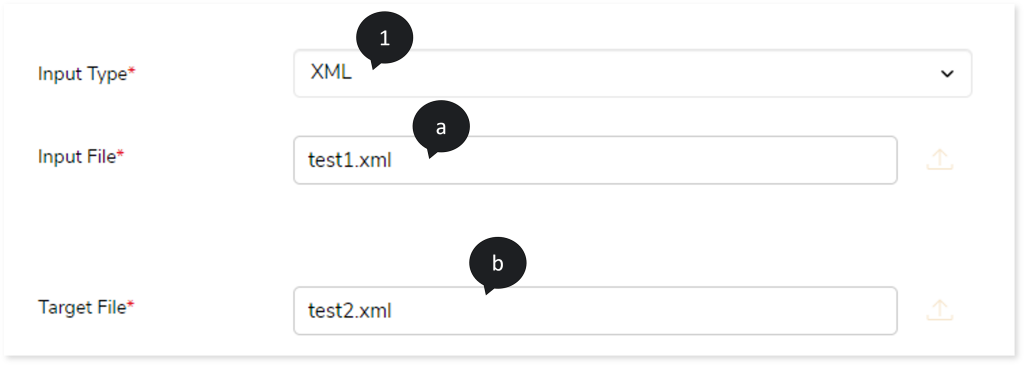
- In Input Type, select the input type as XML or Spark. If you choose Input Type as XML, then:
- In Input File, upload the source XML file.
- In Target File, upload the target XML file.

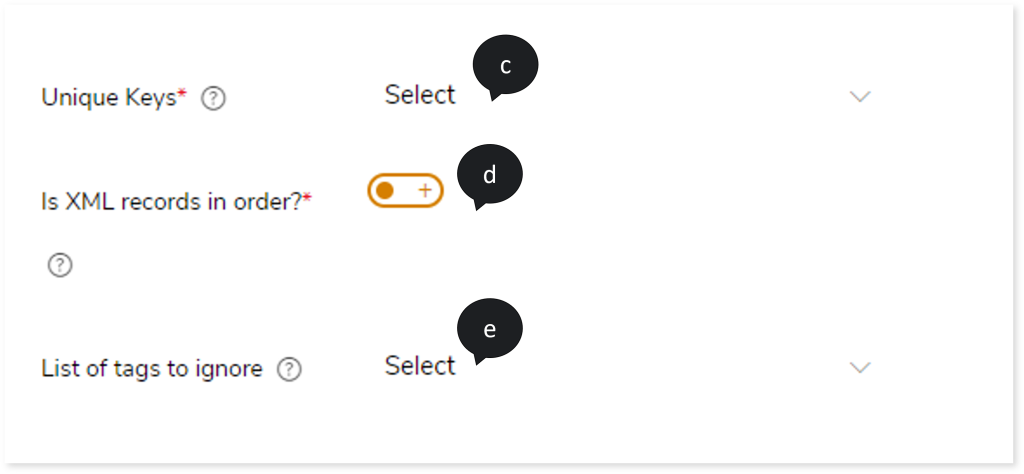
- In Unique Keys, select the column name of the unique key that is used to identify and refer to the columnar data.
- If the XML records are in order for reference, turn on the Is XML records in order? toggle.
- In List of tags to ignore, select the tags that need to be ignored while performing validation.

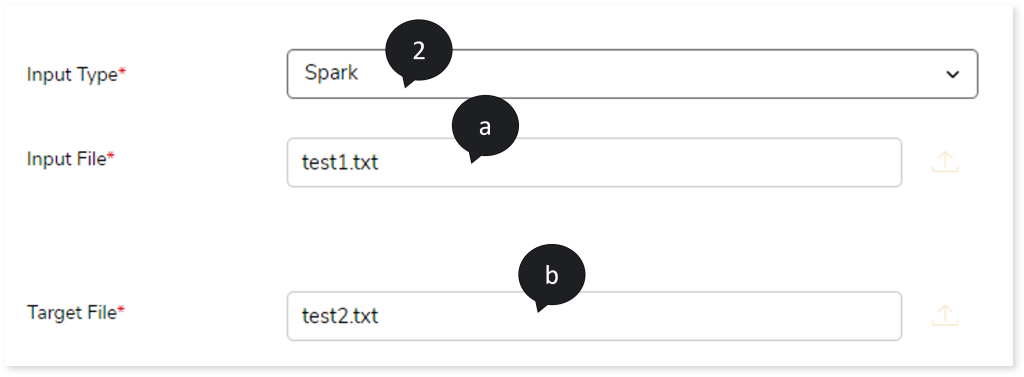
- If you choose Input Type as Spark, then:
- In Input File, upload the source TXT file.
- In Target File, Upload the target TXT file.

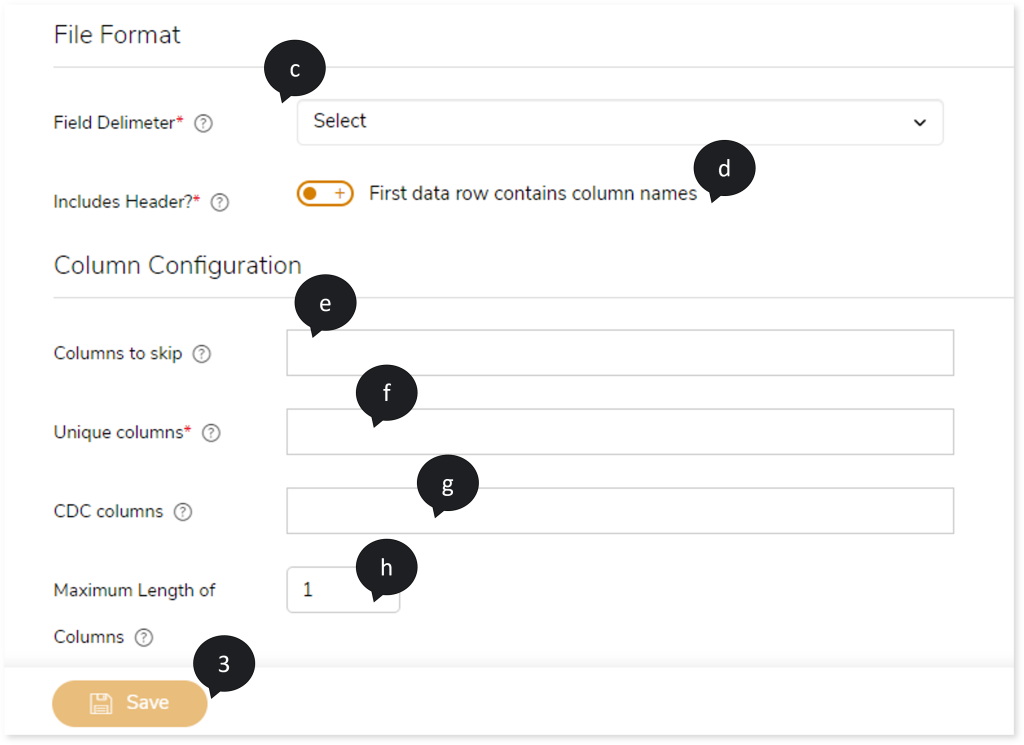
- In Field Delimeter, select the field separator that delimits the information across the columns in the input file, such as Hash {#}, Colon {:}, Comma {,} etc.
- If the uploaded file contains header for the columns, turn on the Includes Header toggle.
- In Columns to skip, provide the columns which need to be skipped from the input file.
- In Unique columns, provide the column which needs to be considered as the unique column.
- In CDC columns, provide the columns which need to be considered as CDC columns.
- In Maximum Length of Columns, provide the maximum length of columns that needs to be set for all the columns.

- Click
 to save the File Validation stage. When File Validation stage is successfully saved, the system displays an alerting snackbar pop-up to notify the success message.
- Click
 to execute the pipeline. Clicking
  (Execute) navigates you to the pipeline listing page which shows your pipeline status as Running state. It changes its state to Success when it is completed successfully.
- Click on your pipeline card to see reports.