Configuring Tableau to Looker Conversion Stage
This topic offers comprehensive guidance to convert Tableau reports and dashboards into Looker equivalent using the BI Conversion stage. For seamless migration, the process involves creating an integrated pipeline that includes both the BI conversion and Execution stages.

In This Topic:
Configuring BI Conversion Stage
This section provides steps to configure the Tableau to Looker conversion.
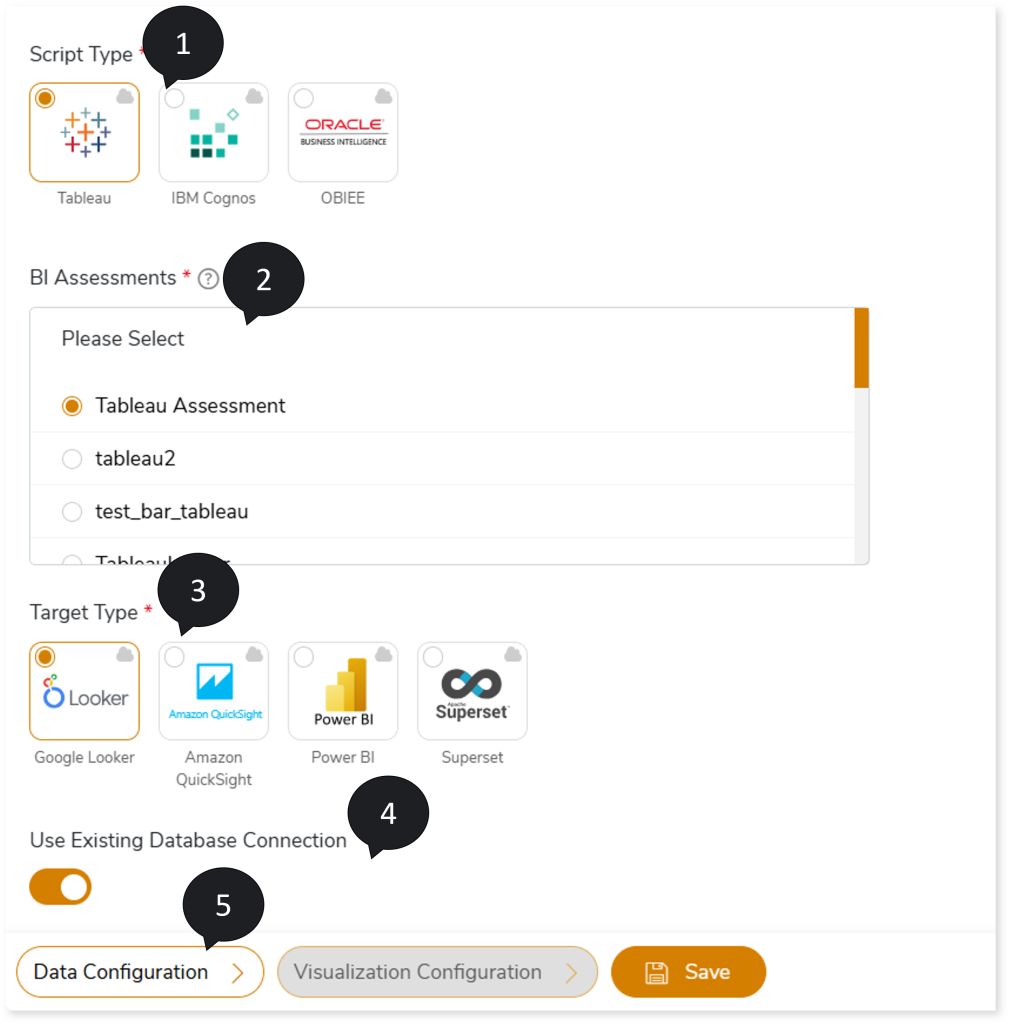
- In Script Type, select Tableau.
- In BI Assessments, select the report from the BI assessments that you want to transform.
- In Target Type, select Looker.
- To use the existing database connection in Looker for the conversion process, turn on Use Existing Database Connection; else, a JSON file with Looker API connection details will be generated, which can be used to access Looker and call its APIs to migrate the source BI reports.
- Select Data Configuration to configure the data for conversion.
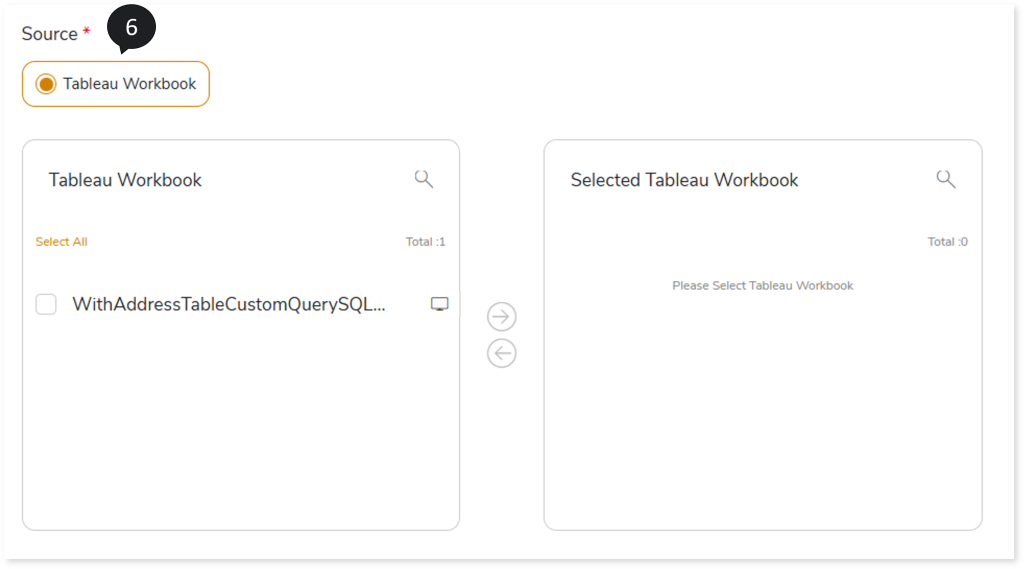
- In Source, select the workbooks you need to transform. To select the workbooks to transform, follow the steps below:
- Select Tableau Workbook.
- Select the required workbooks from the Tableau Workbook card.
- Click
 to move the selected workbooks to the Selected Tableau Workbook card.
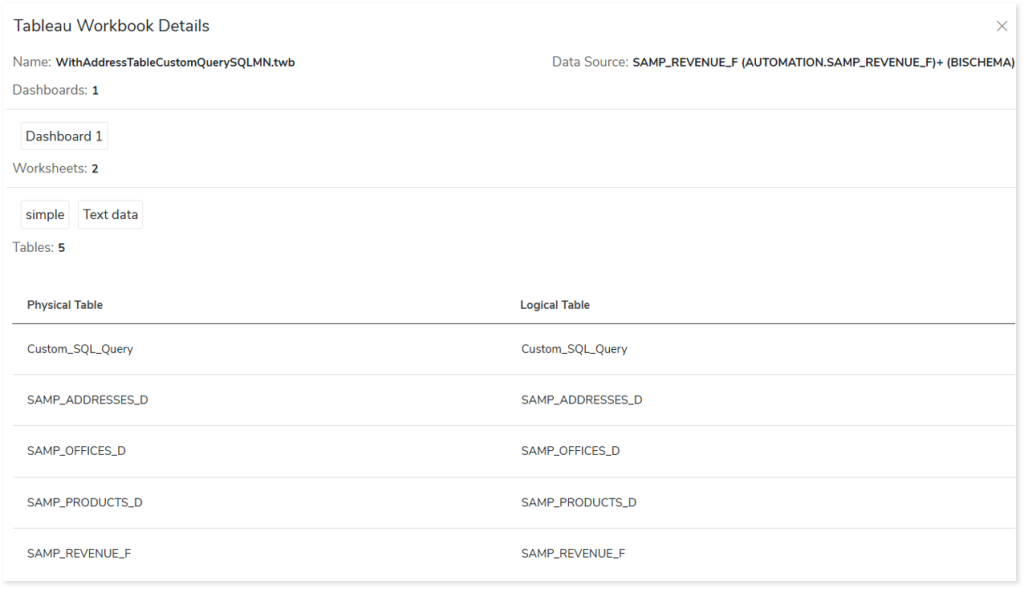
In the Tableau Workbook or Selected Tableau Workbook card, click  on the preferred workbook to get more details about the workbook. It includes information about dashboards, data sources, and worksheets along with its associated physical and logical tables.
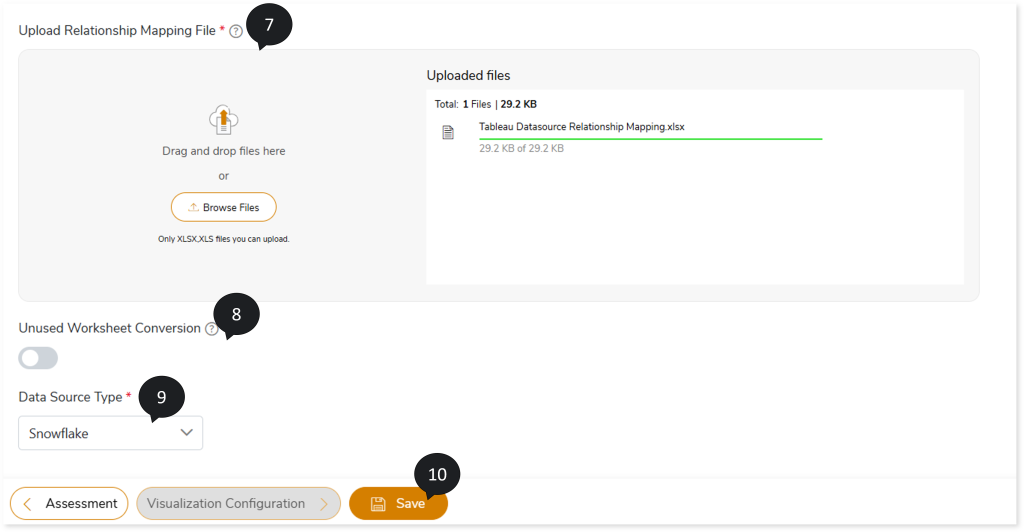
- In Upload Relationship Mapping File, upload the relationship mapping file generated as one of the assessment reports by the name Tableau Data Source Relationship Mapping.xlsx. The following are the steps to upload the relationship mapping file:
- Go to the Reports section in the assessment.
- Download Insights and Recommendations.
- The downloaded archived file contains the relationship mapping file. Update the required cardinalities of physical and logical tables in the From Cardinality and To Cardinality columns.

- Upload the updated Tableau Data Source Relationship Mapping.xlsx file in the Upload Relationship Mapping File field.
- To convert worksheets that are not used in the dashboard, turn on the Unused Worksheet Conversion toggle.
- In Data Source Type, select the target database such as SQL Server, Redshift, or Snowflake to which you need to transform the data. This transformed data will act as the source for the Looker BI tool.
- Click Save to update the changes.
Configuring Execution Stage
The Execution stage allows transformed BI reports to be executed on target platforms. In the integrated pipeline, all the input data is automatically fetched from the previous stage (BI Conversion stage) for execution.
To configure the Execution stage, follow the below steps:
- In Target Data Source, upload the target data source to execute the transformed queries. To do so, follow the below steps:
- Click Target Data Source.
- Choose repository.
- Select data source.
- Click
 to save the target data source.
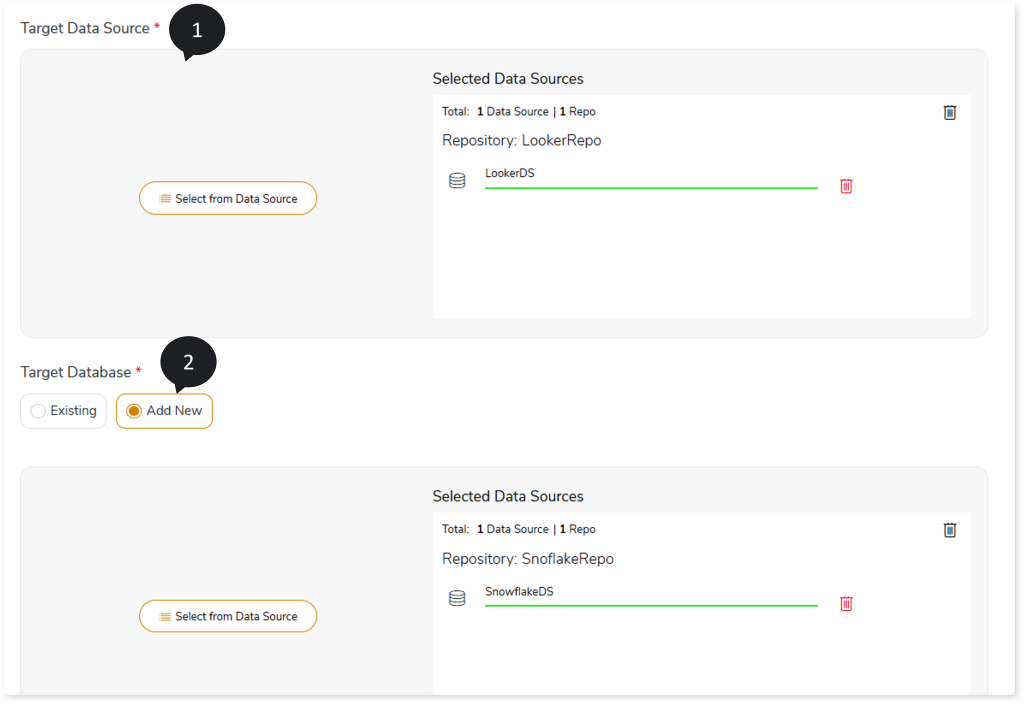
- In Target Database, specify the database connection details from which Looker needs to fetch the input data. You can either select the Existing or Add New depending on the scenarios.
- Existing: When an existing database connection is available on Looker.

- Add New: When an existing database connection is not available, then you need to select the repository data source (SQL Server, Redshift, or Snowflake) which contains the data source connection details. It will create a connection and enable Looker to access data from the data source.
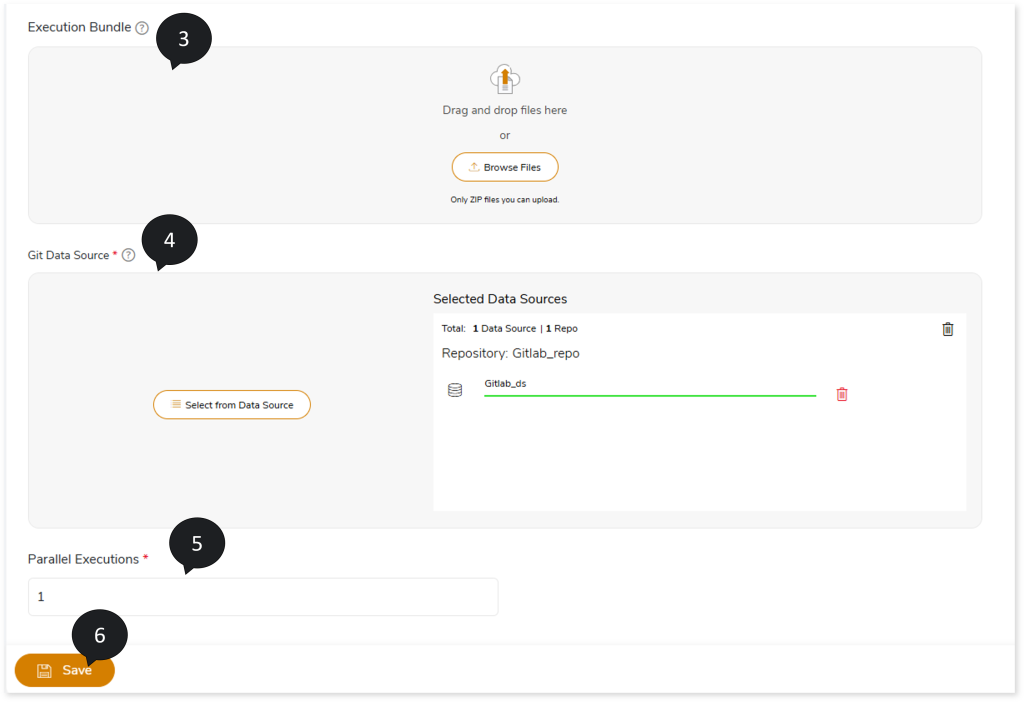
- In Execution Bundle, upload the converted scripts that need to be executed over the selected target. In the integrated pipeline, converted artifacts will be automatically fetched from the previous stage (BI Conversion stage).
- In Git Data Source, select the Git-based data source (such as GitLab or GitHub) that provides authentication credentials to access metadata required for migration. To execute the converted artifacts on Looker, it is mandatory to push the generated project and LookML connection details to Git. This enables Looker to create datasets and looks (visuals) in Looker.
- In Parallel Executions, specify the number of jobs that should be executed in parallel.
- Click Save to update the changes.
- Click
 to provide a preferred pipeline name and to save the pipeline.
- Click
 to execute the integrated or standalone pipeline. Clicking
  (Execute) navigates you to the pipeline listing page which shows your pipeline status as Running state. It changes its state to Success when it is completed successfully.
- Click on your pipeline card to see reports.
To view the Tableau to Looker Conversion Stage report, visit Tableau to Looker Conversion Report