Configuring Tableau to Power BI Conversion Stage
This topic provides steps to configure the Tableau to Power BI conversion.
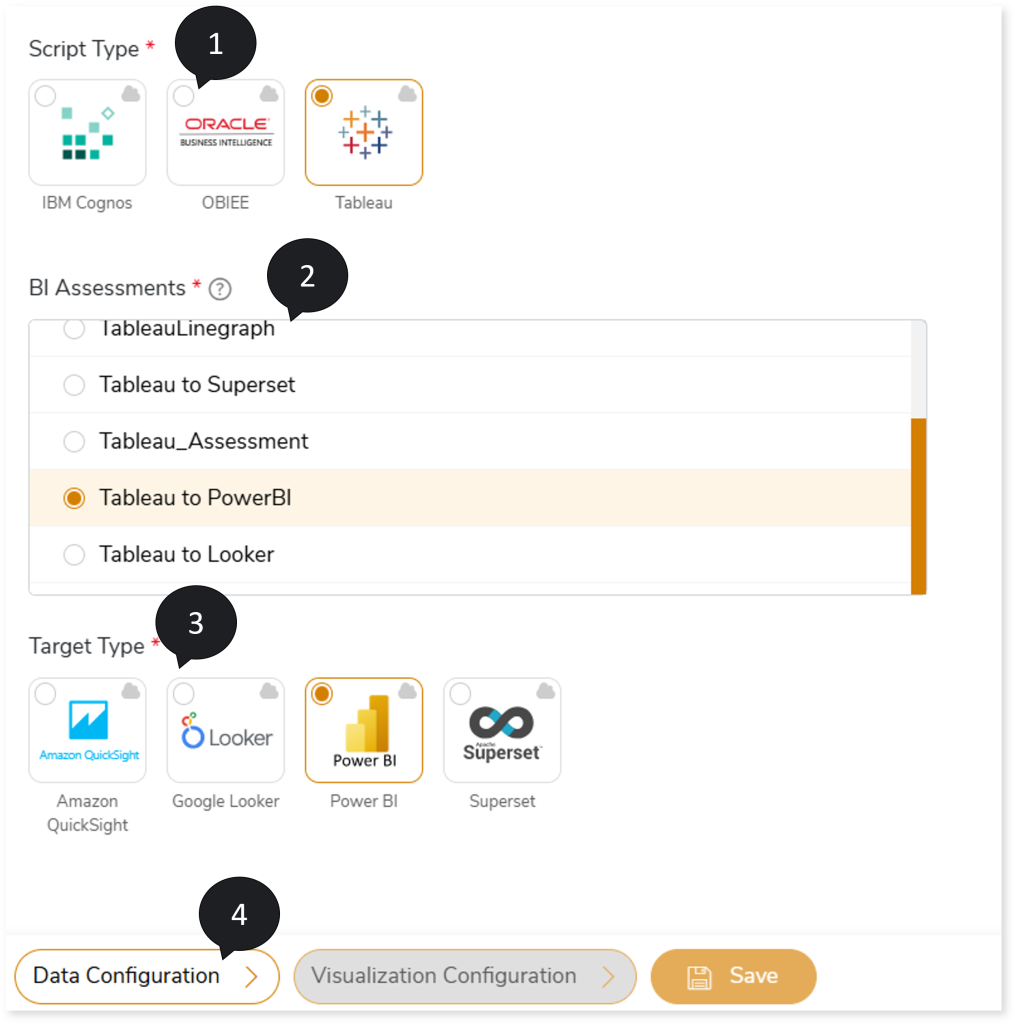
- In Script Type, select Tableau.
- In BI Assessments, select the report from the BI assessments that you want to transform.
- In Target Type, select Power BI.
- Select Data Configuration to configure the data for conversion.
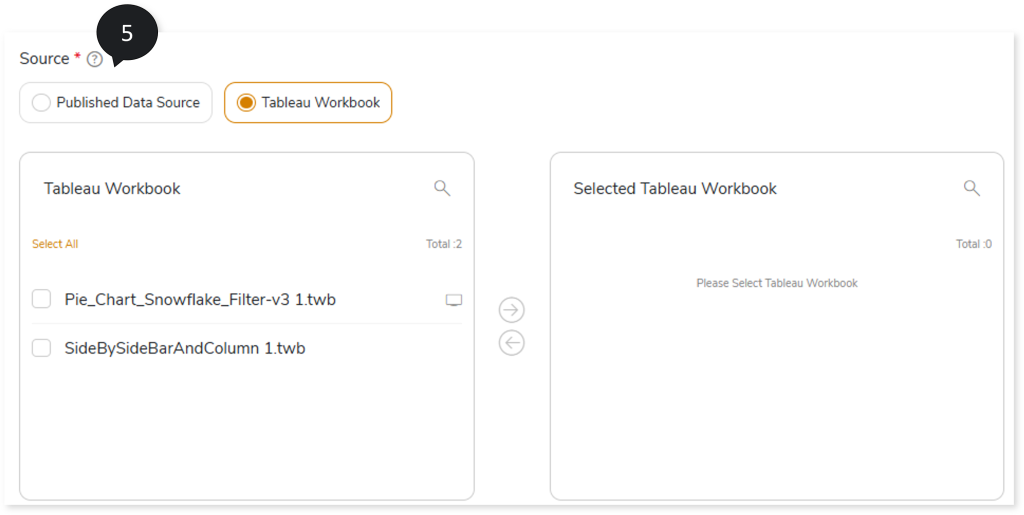
- In Source, select the published data sources or workbooks you need to transform. To select the published data sources or workbooks to transform, follow the steps below:
- Select Published Data Source/ Tableau Workbook.
- Select the required published data sources or workbooks from the Published Data Source or Tableau Workbook card.
- Click
 to move the selected published data sources or workbooks to the Selected Published Data Source or Selected Tableau Workbook card.
In the Tableau Workbook or Selected Tableau Workbook card, click  on the preferred workbook to get more details about the workbook. It includes information about dashboards, data sources, and worksheets along with its associated physical and logical tables.
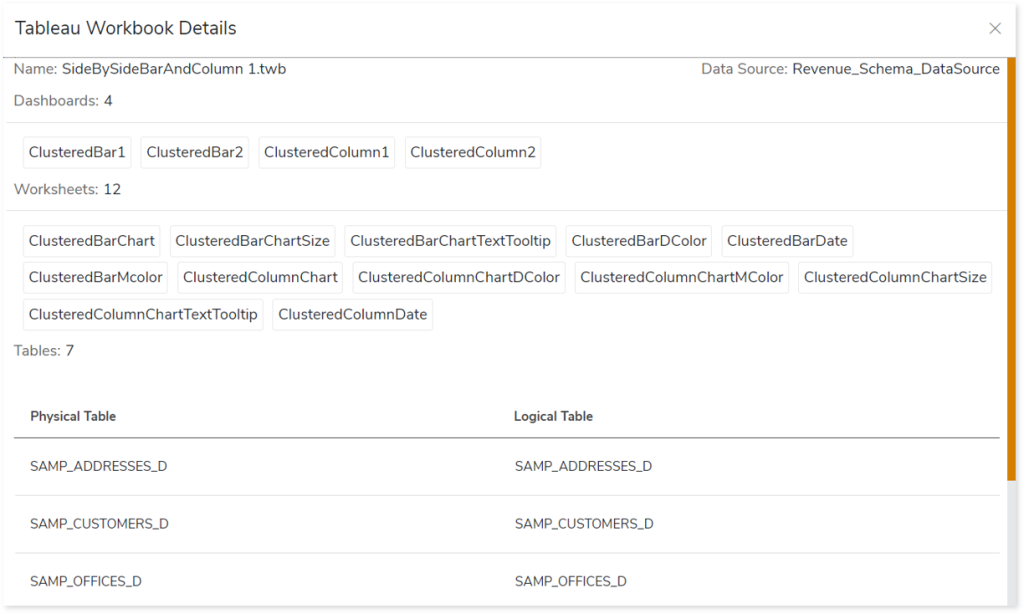
Similarly, In the Published Data Source or Selected Published Data Source card, click on the preferred workbook to get more details about the workbook. It includes information about dashboards, data sources, and worksheets along with its associated physical and logical tables.
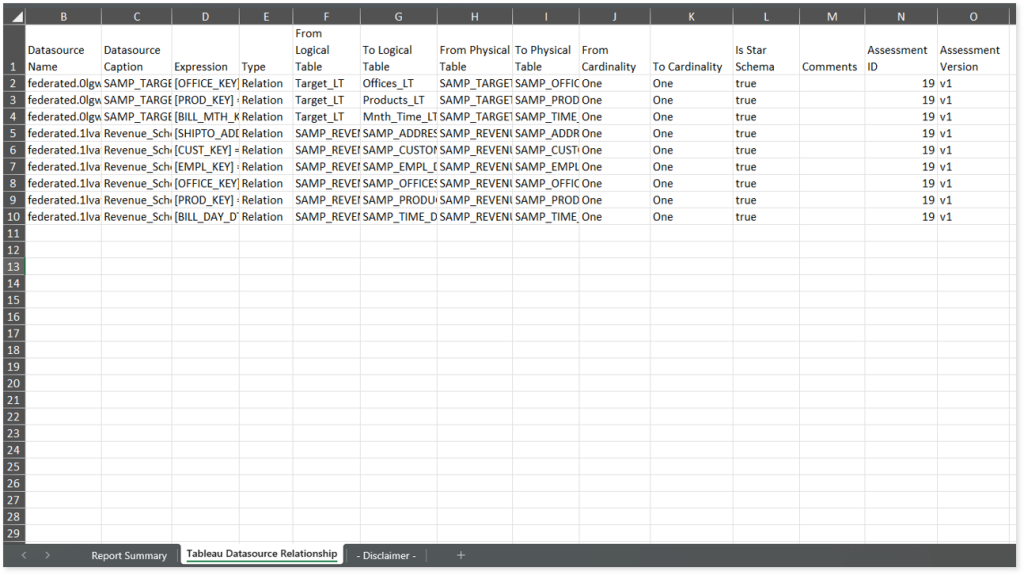
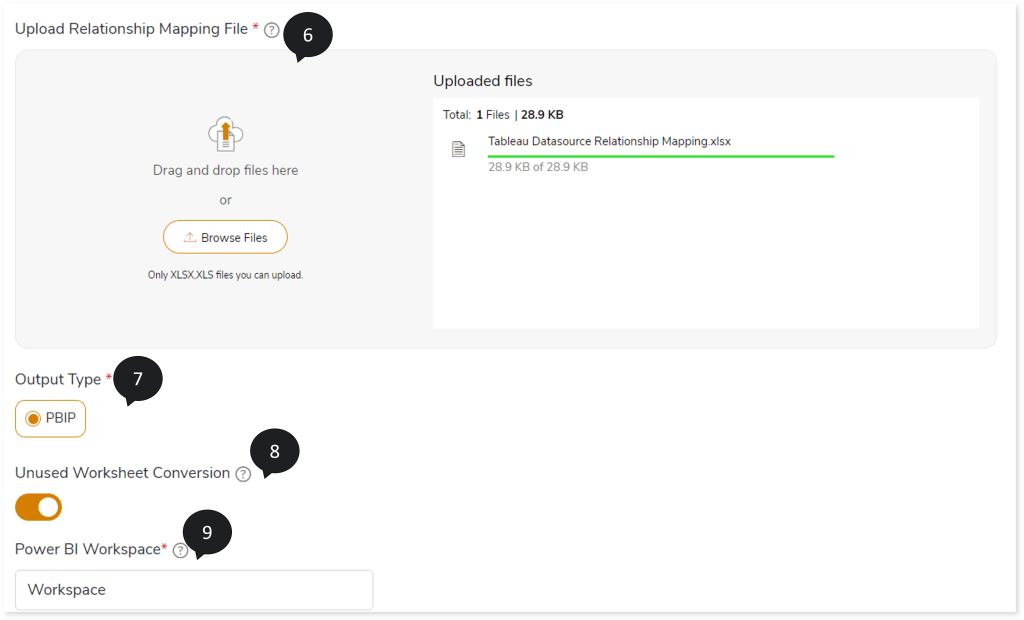
- In Upload Relationship Mapping File, upload a relationship mapping file named Tableau Datasource Relationship Mapping.xlsx which is generated as one of the assessment reports. Before uploading the file, update the required cardinalities of physical tables in the From Cardinality and To Cardinality columns within the report.
- In Output Type, select PBIP as the output type format for the generated artifacts.
- To convert the worksheets that are not used in the dashboard, turn on the Unused Worksheet Conversion toggle.
- In Power BI Workspace, provide the workspace name where you want to publish the output artifacts.
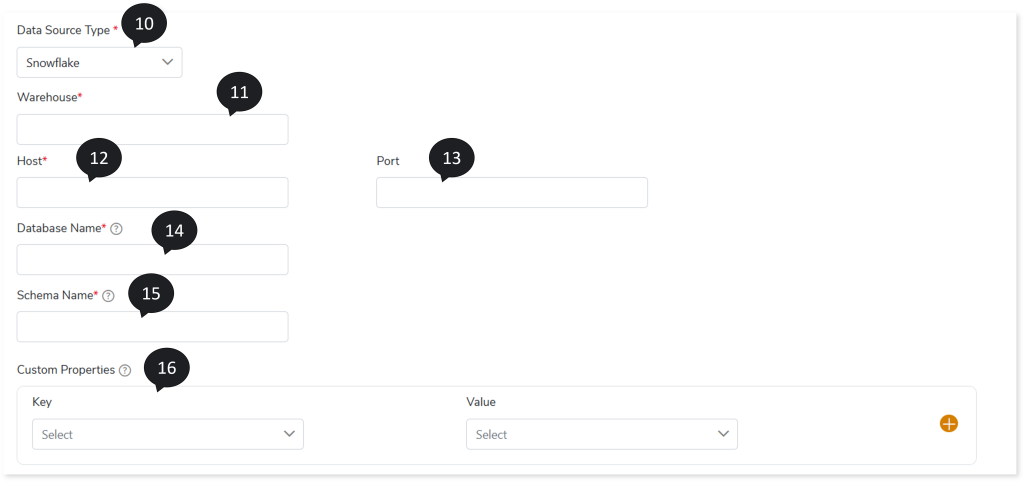
- In Data Source Type, select the source database such as SQL Server, Snowflake, etc., to load the data.
- In Warehouse, provide the data source warehouse details.
- In Host, provide the data source host address.
- In Port, provide the data source port number.
- In Database Name, provide the database from which you need to fetch the source data.
- In Schema Name, provide the corresponding schema from which you need to fetch the data.
- In Custom Properties, define key-value pairs to dynamically configure the custom property at runtime. To define custom properties, select the existing key-value pair from the dropdown or enter the property value manually.
The table below lists all custom properties along with the key-value pair.
|
Key |
Definition |
Value |
|
Upper Lower Case Type Key |
Used to configure the case format for queries in the respective target database. |
- Lower Case - To apply lower case to all target queries
- Upper Case - To apply upper case to all target queries
- Blank - To avoid case formatting and to retain the original format of the queries.
|
- In AI Augmentation, select the preferred Transformation model to convert calculations that require augmented transformation and then optimize them and validate them for accuracy and optimal performance.
- In Transformation Model, select the preferred Transformation model to convert calculations that are not handled by the default LeapLogic Core transformation engine to the target equivalent. The Transformation Model supports both Open-Source AI models (LeapLogic) and Enterprise AI models (Amazon Bedrock such as Claude, Nova, etc.) for transformation. The Open-Source AI models include:
- OpenOrca 7B, GPTQ 4-bit quantized Model (Hugging Face), Llama 8B, 16-bit quantized Model (Ollama), and Llama 8B, 4-bit quantized Model (Ollama): To convert small- to medium calculations.
- Code Llama 34B, GPTQ 4-bit quantized Model (Hugging Face): To convert complex calculations.
- In Additional Prompt, provide supplementary instructions in addition to system-generated prompts.
- In Response Fine Tuning, provide examples based on the additional prompt to fine-tune the response to align the generated output with your preferred level of detail.
- In Review Model, select one or more Review models from to perform syntax validation on the calculations transformed by the LeapLogic Core engine and the Transformation Model. The Review model validates the transformed calculations and recommends any changes as required until the calculation is thoroughly verified. You can configure multiple Review models. When multiple Review models are configured:
- The first Review model validates the calculations transformed by the LeapLogic Core engine and the Transformation model. If any calculations are identified as incorrectly transformed, it suggests updated calculations.
- The updated calculations are then passed to the next Review model, which validates them and suggests corrections, if required.
- This process continues through all configured Review models until the calculations are successfully validated, and the optimized queries are generated.
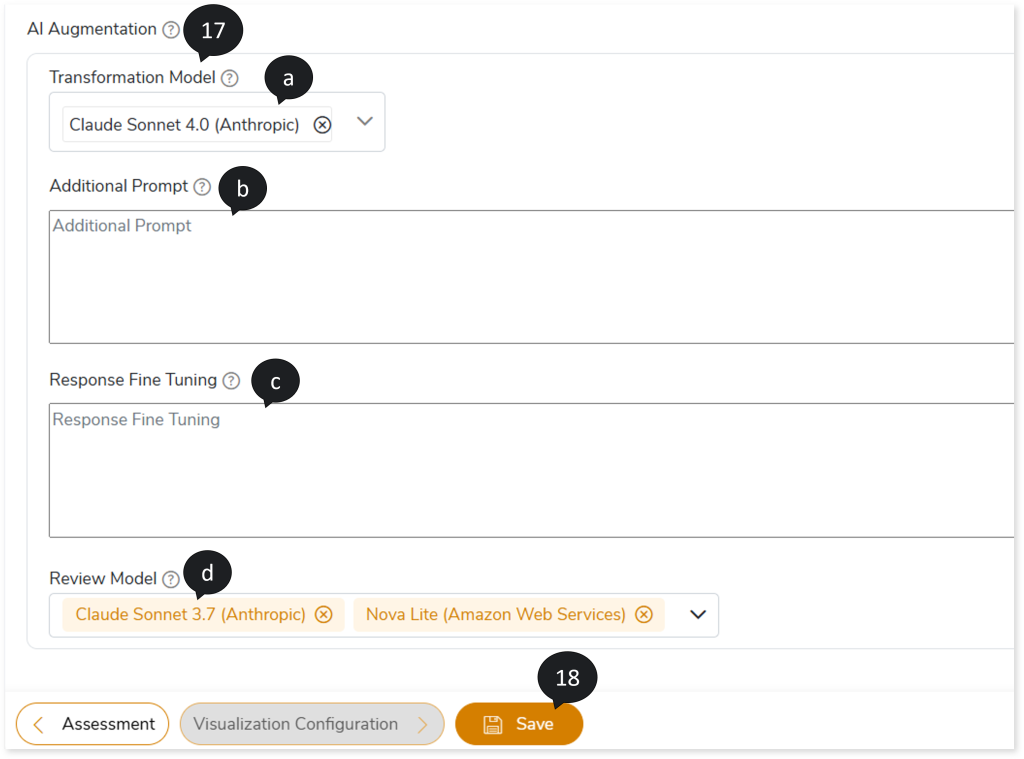
- Click Save to update the changes.
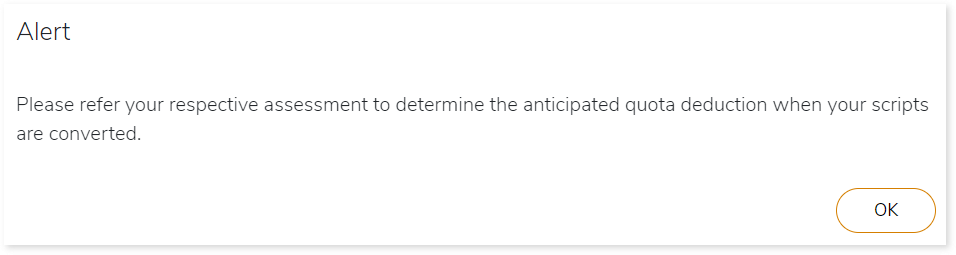
- An alert pop-up message appears. This message prompts you to refer your respective assessment to determine the anticipated quota deduction required when converting your scripts to target. Then click Ok.
- Click
 to provide a preferred pipeline name and to save the pipeline.
- Click
 to execute the integrated or standalone pipeline. Clicking (Execute) navigates you to the pipeline listing page which shows your pipeline status as Running state. It changes its state to Success when it is completed successfully.
- Click on your pipeline card to see reports.
To view the Tableau to Power BI Conversion report, visit Tableau to Power BI Conversion report.